
目标检测是一种与计算机视觉和图像处理相关的计算机技术,主要用于检测数字图像和视频中某一类语义物体(如人、建筑物或汽车)的实例。1我们可以用它来检测印有条码的物体, 比如标签和图书,来辅助条码识别。先检测物体,然后读取这些物体上的条码,这样做可能有以下的好处:
- 提高读取速度
- 检查是否有未读的条码
- 保存印有条码的物体的图像
在本文中,我们将讨论一些目标检测方法,以及如何将它们与条码识别相结合。代码使用Python编写。使用OpenCV进行图像处理,Dynamsoft Barcode Reader用于条码识别。
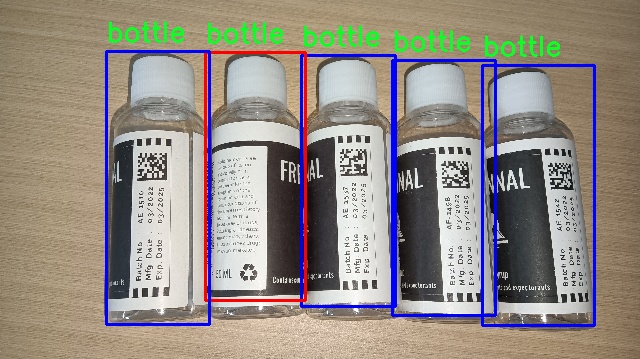
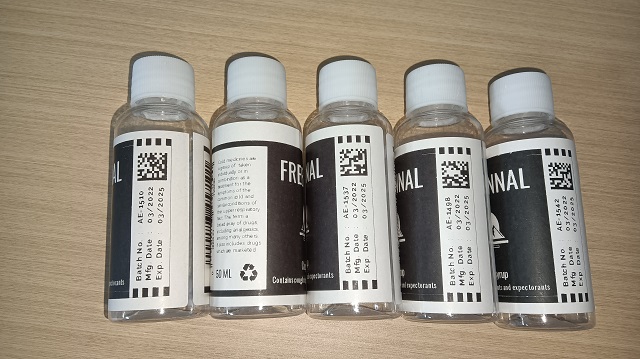
示例图(检测到5个瓶子。其中1个瓶子未读取到条码):
目标检测
检测目标物体的方法有很多。如果物体具有鲜明的特征,我们可以使用一些简单的图像处理方法来检测它们。如果物体较复杂,我们可以使用深度学习来检测它们。
下面,我们将列举一些目标检测方法。
利用轮廓查找进行目标检测
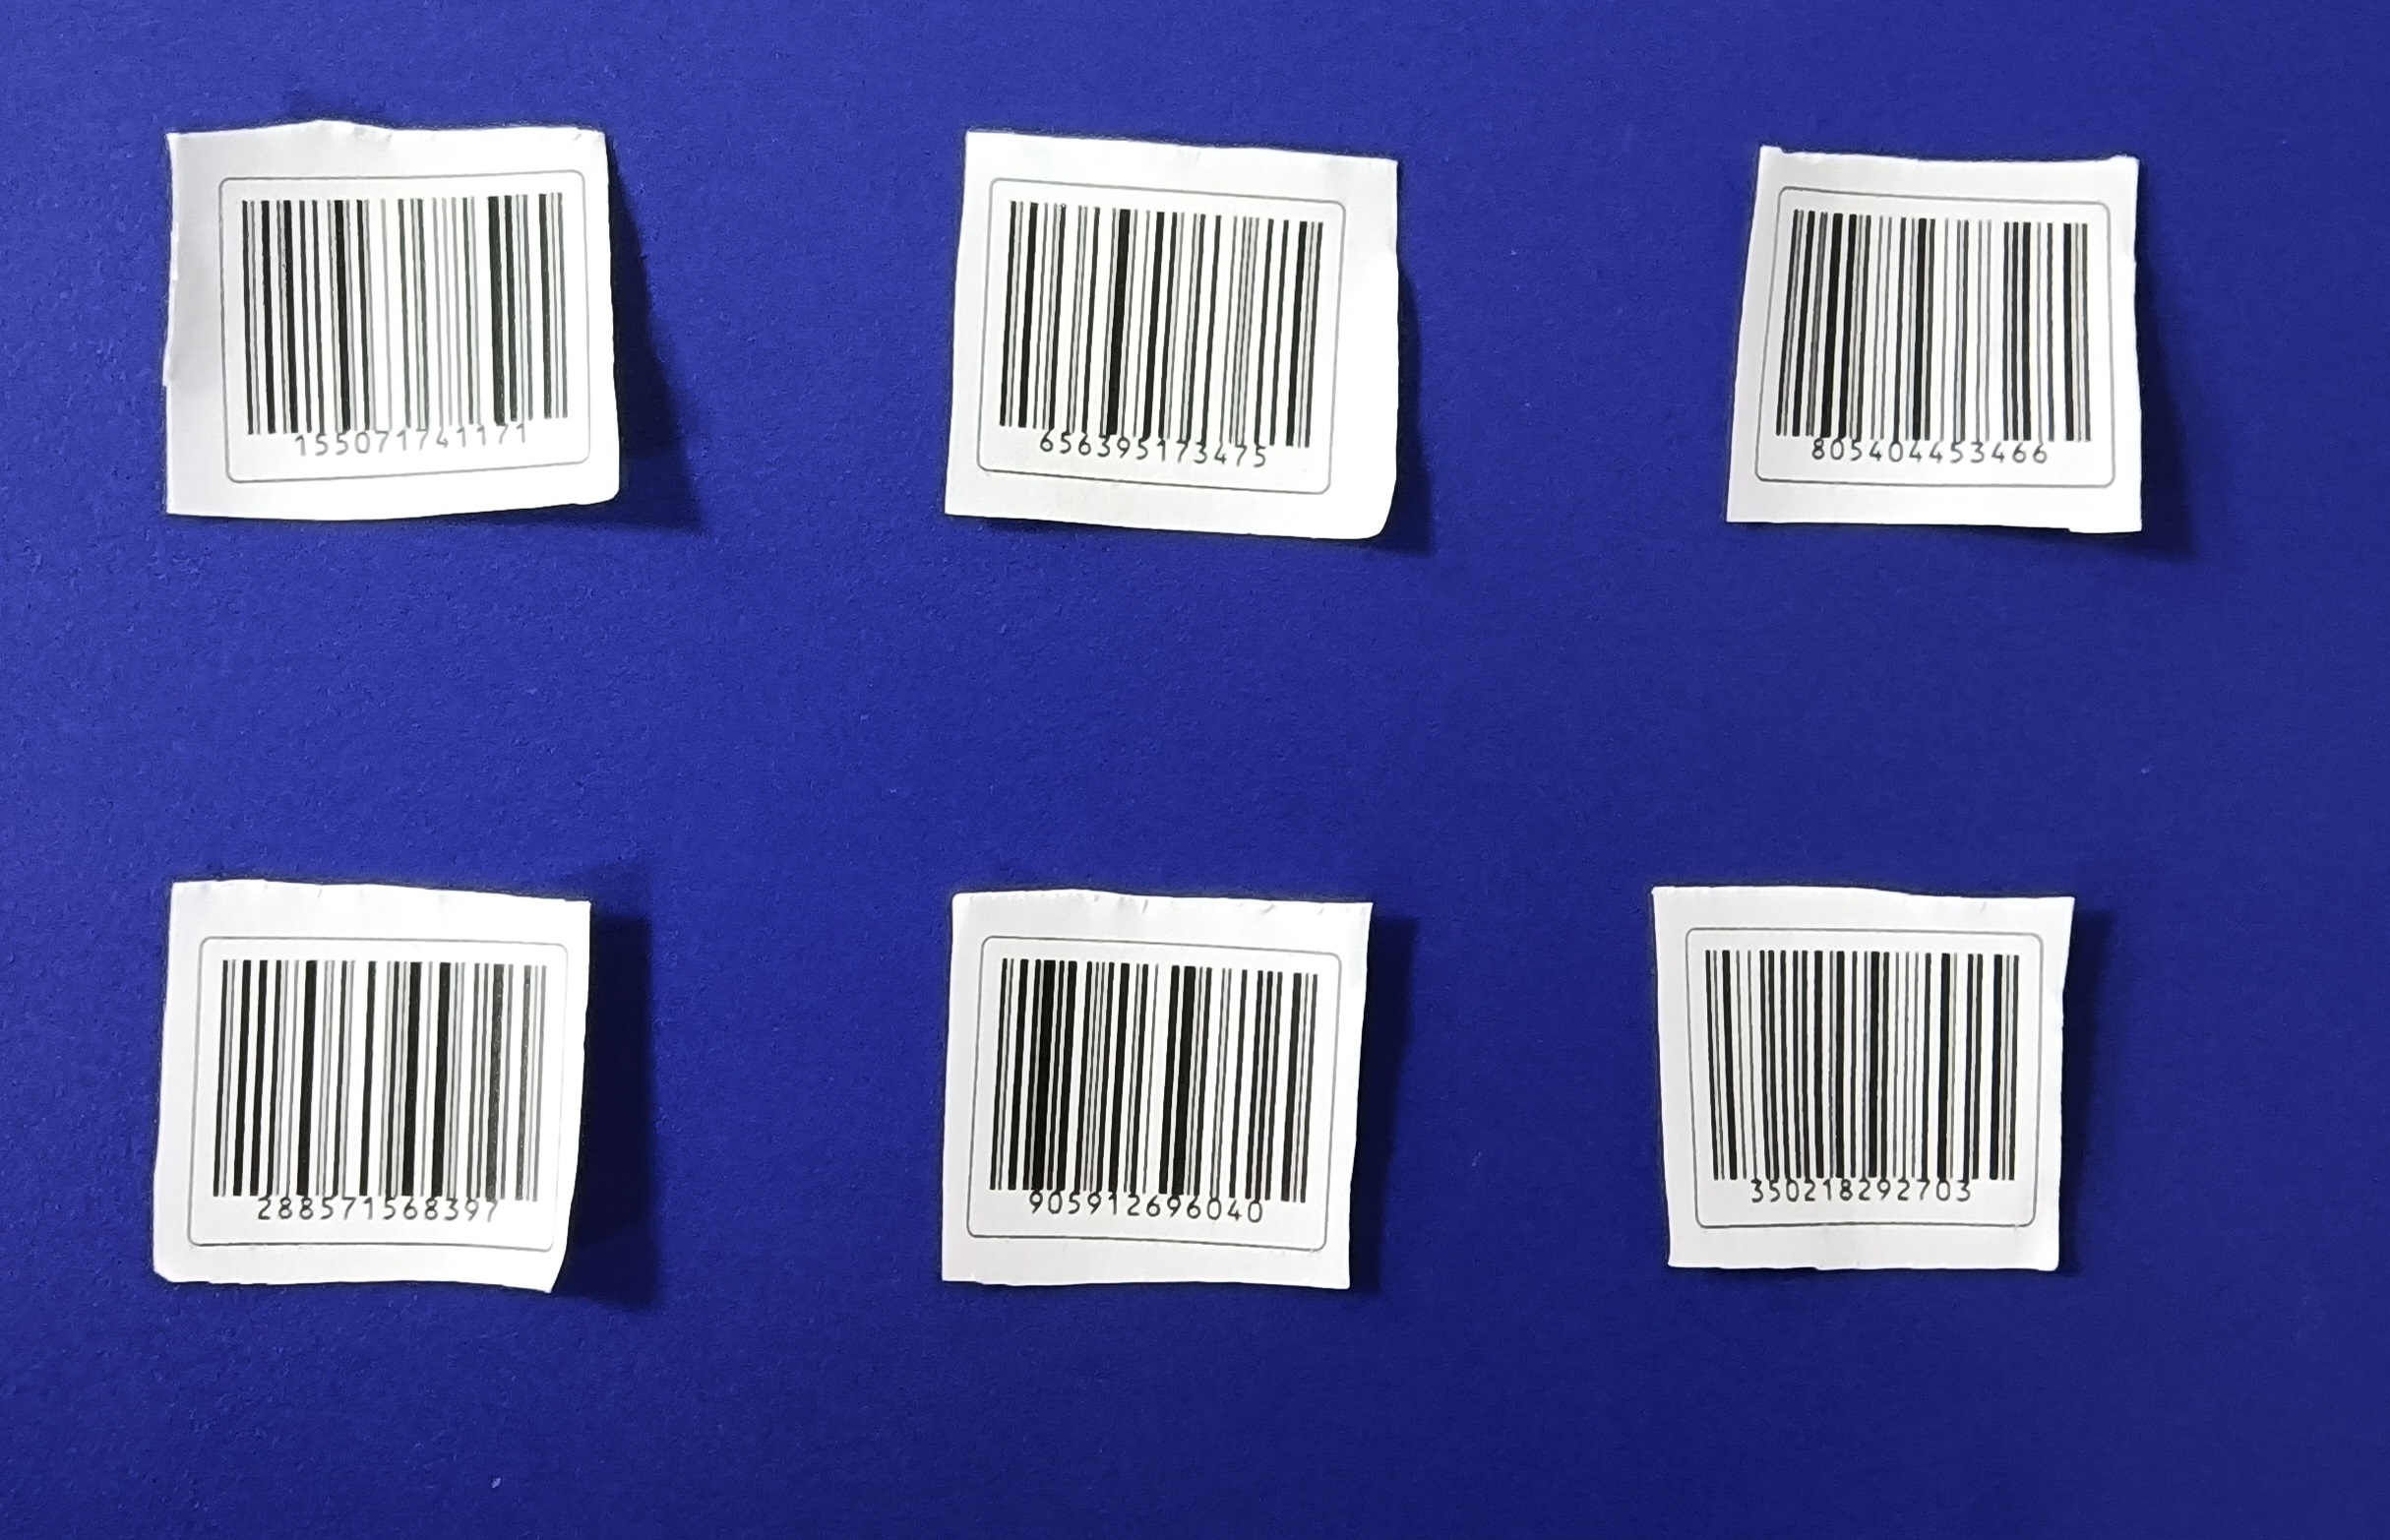
对于下图这样放在蓝色板子上的标签,我们可以通过查找轮廓来检测它们。
-
执行阈值处理,得到二值图像:
original_image = cv2.imread("img.jpg")
gray = cv2.cvtColor(original_image, cv2.COLOR_BGR2GRAY)
ret,thresh = cv2.threshold(gray,200,255,cv2.THRESH_BINARY)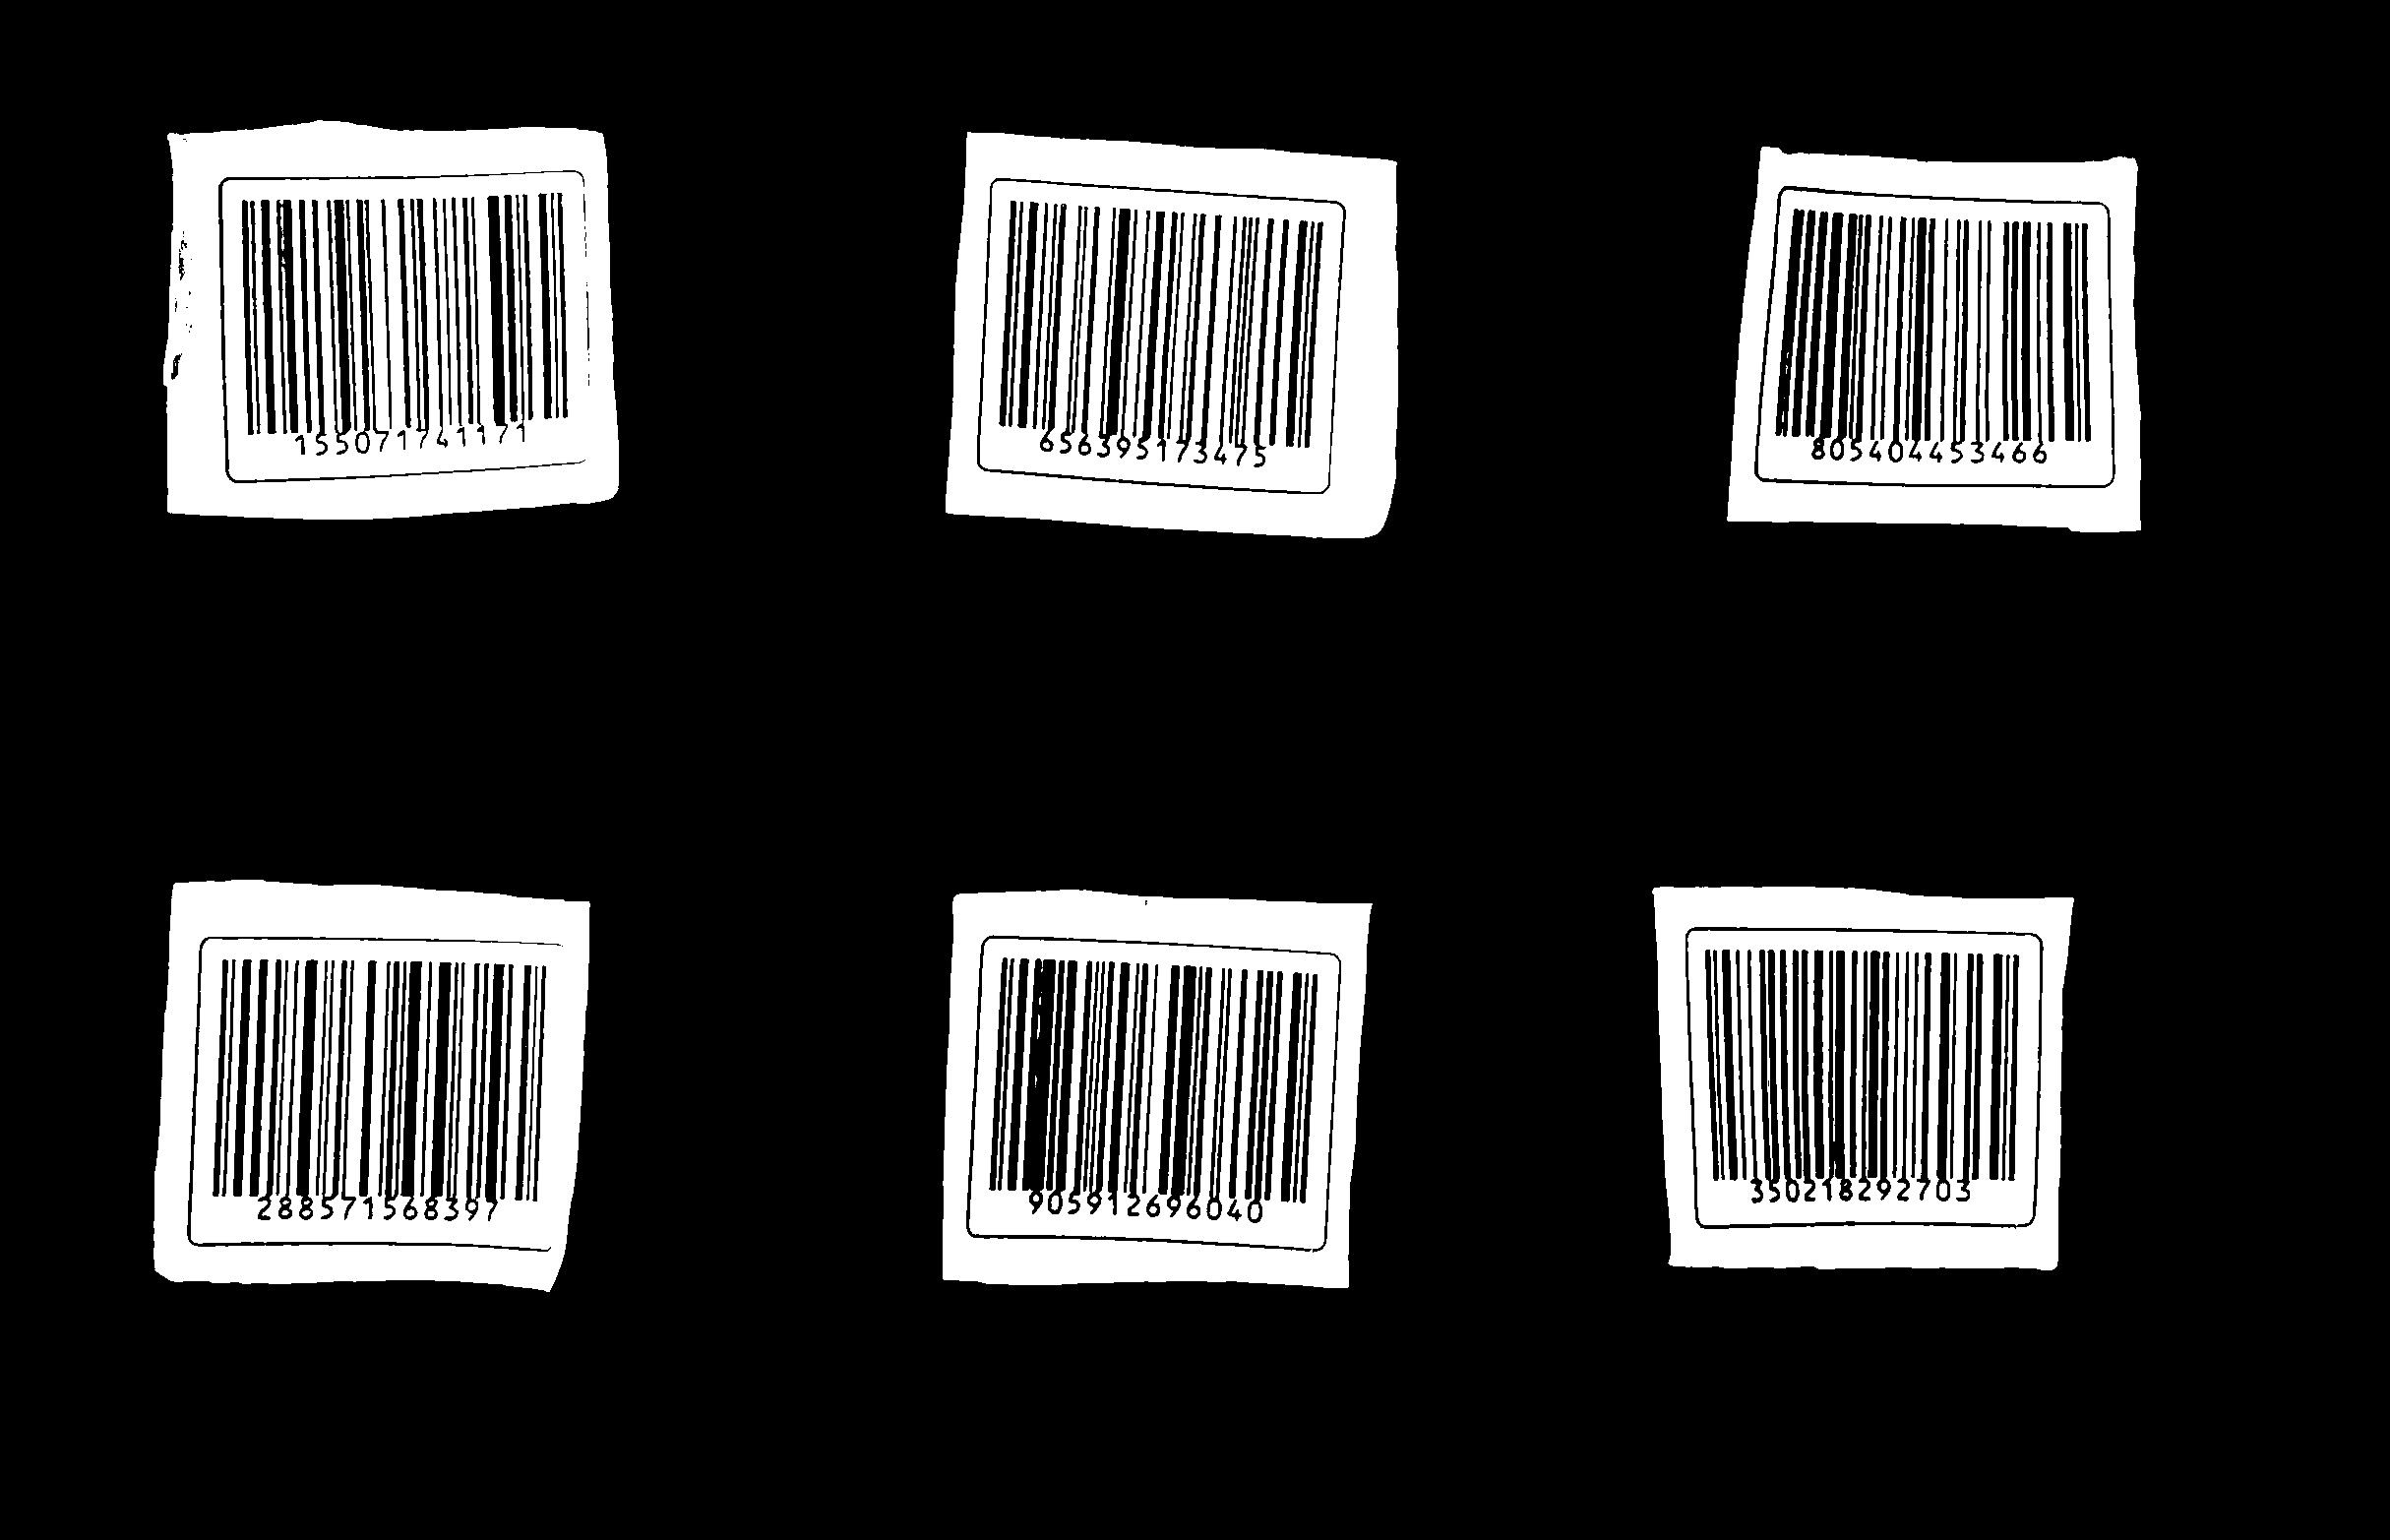
-
查找轮廓,筛选掉不规则的小的轮廓,并绘制其外接矩形。
contours, hierarchy = cv2.findContours(thresh, cv2.RETR_EXTERNAL, cv2.CHAIN_APPROX_SIMPLE)
rects = []
for cnt in contours:
    rect = cv2.boundingRect(cnt)
    x, y, w, h = rect
    if w > 50 and h > 20 and w>h:
        rects.append(rect)

height, width, _ = original_image.shape
min_x, min_y = width, height
max_x = max_y = 0
for (x,y,w,h) in rects:
    color = (255,0,0)
    min_x, max_x = min(x, min_x), max(x+w, max_x)
    min_y, max_y = min(y, min_y), max(y+h, max_y)
    cv2.rectangle(original_image, (x,y), (x+w,y+h), color, 5)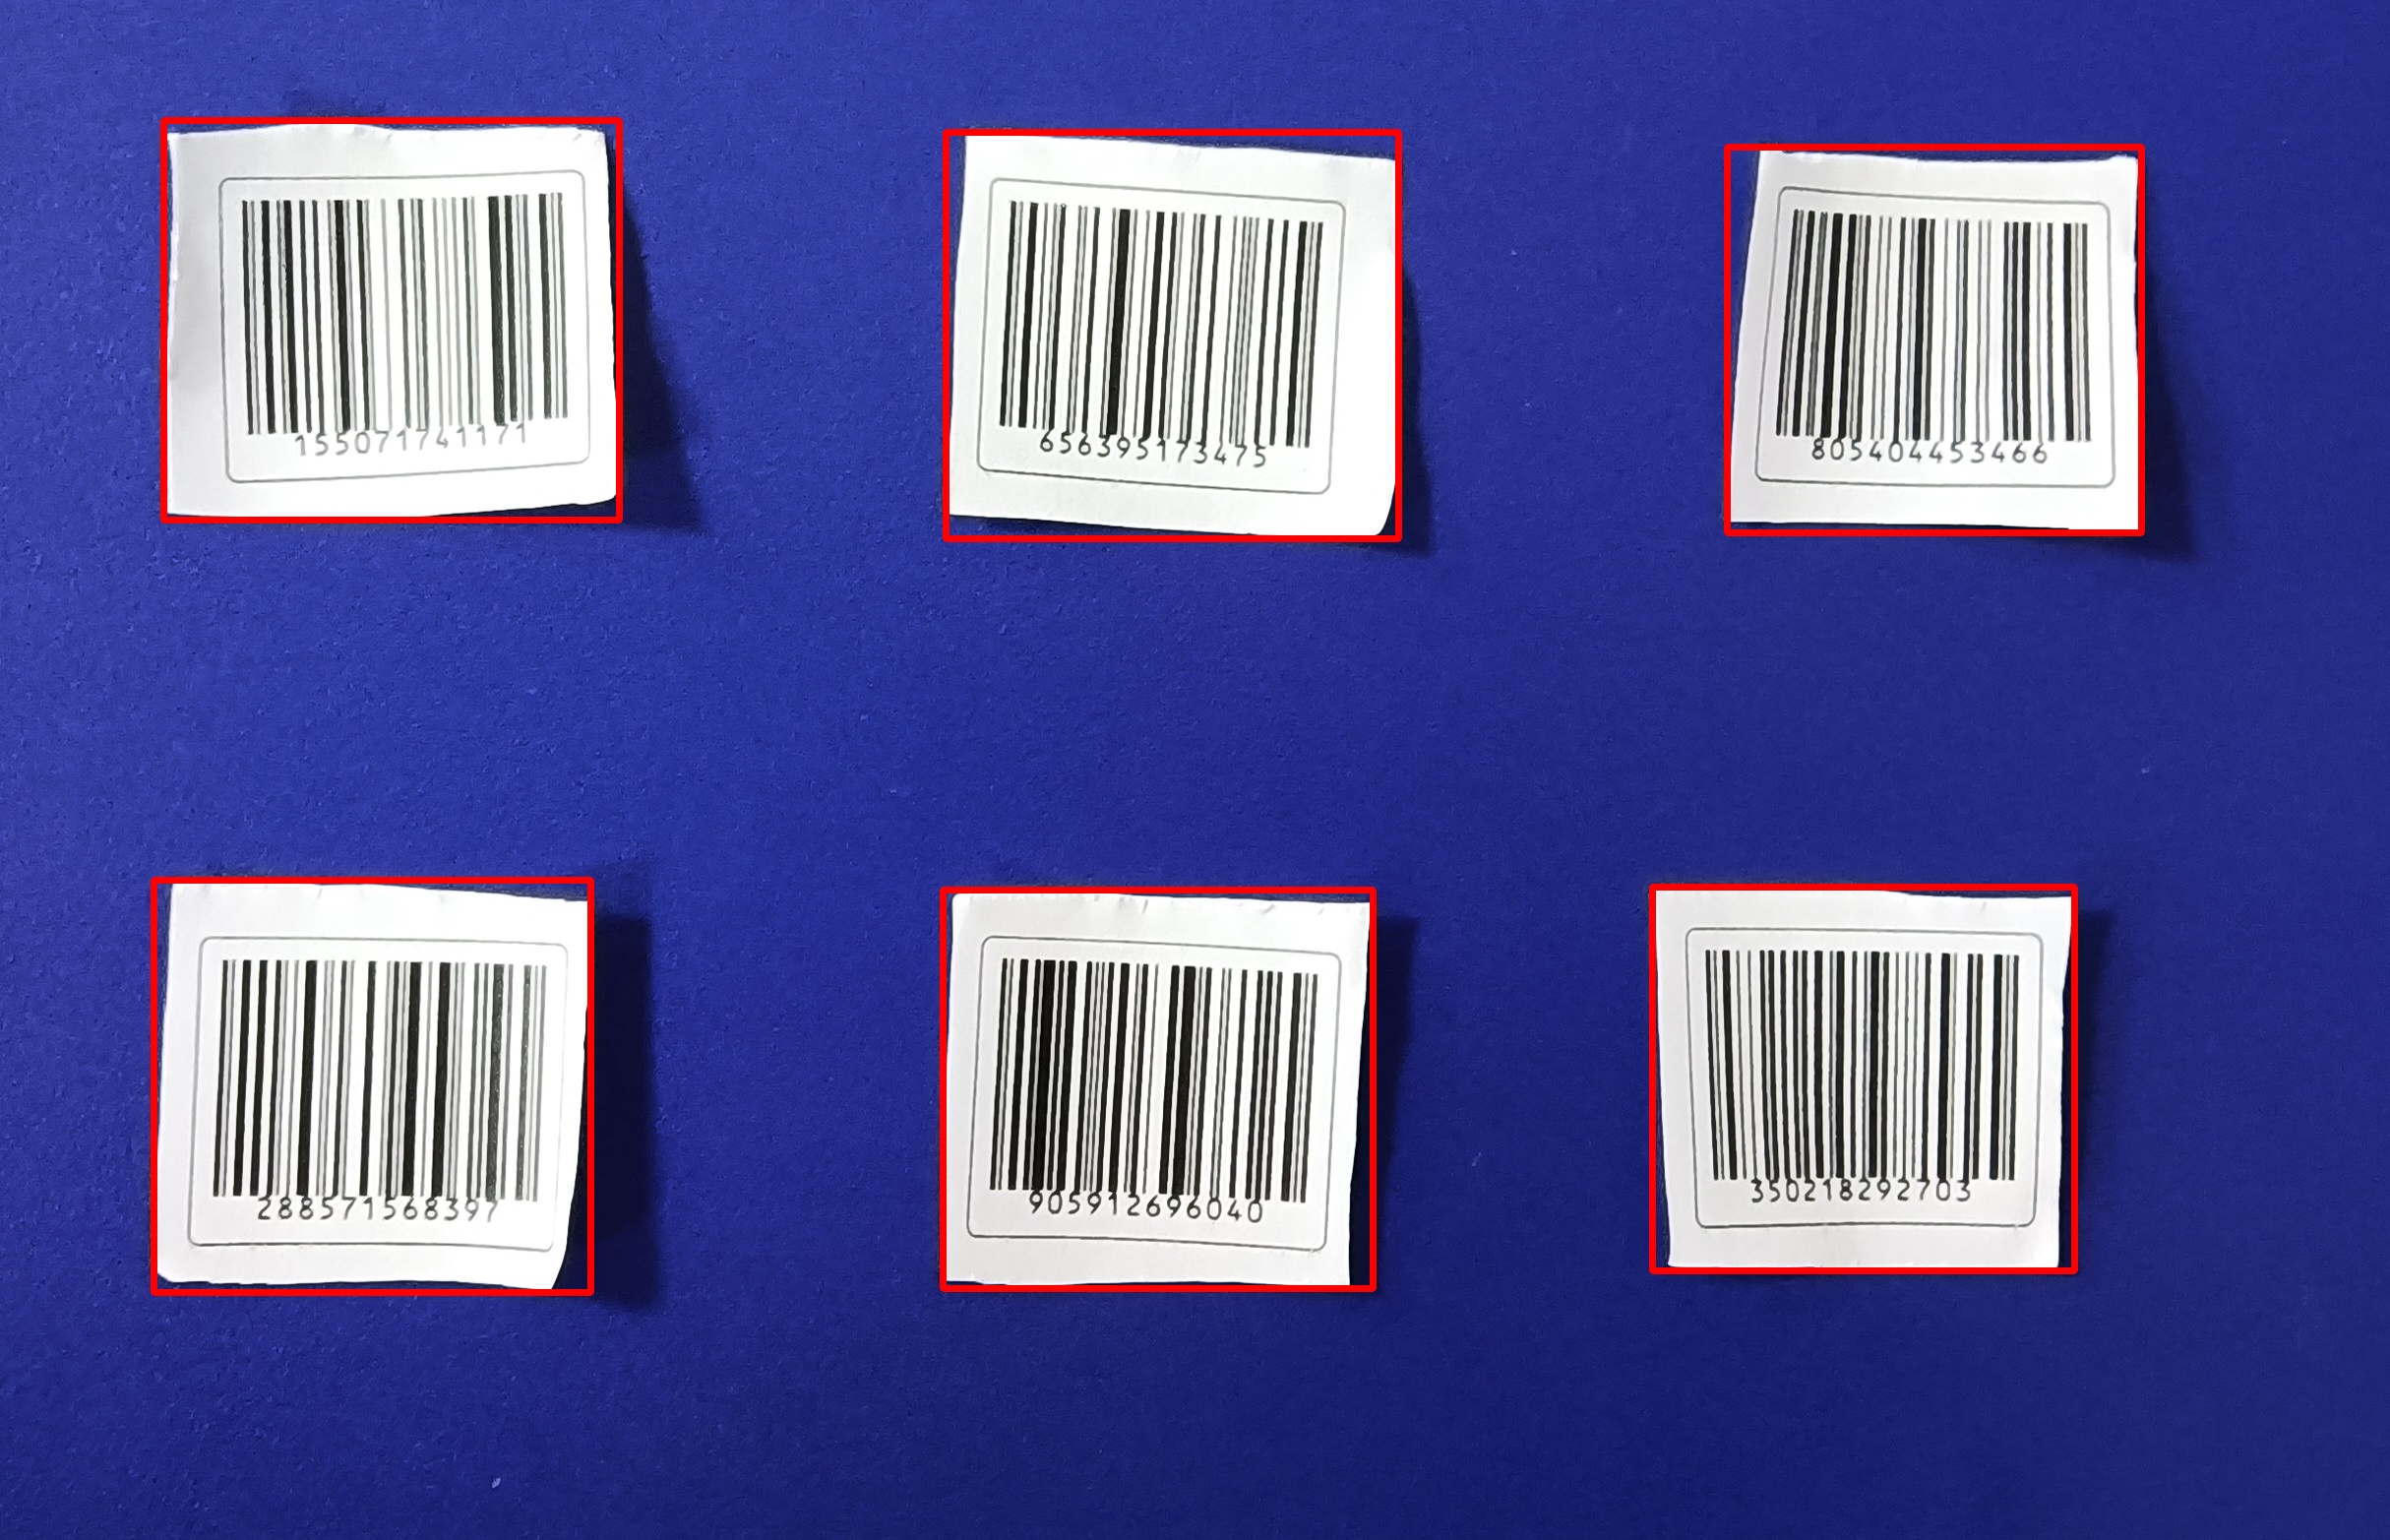
使用颜色分割进行目标检测
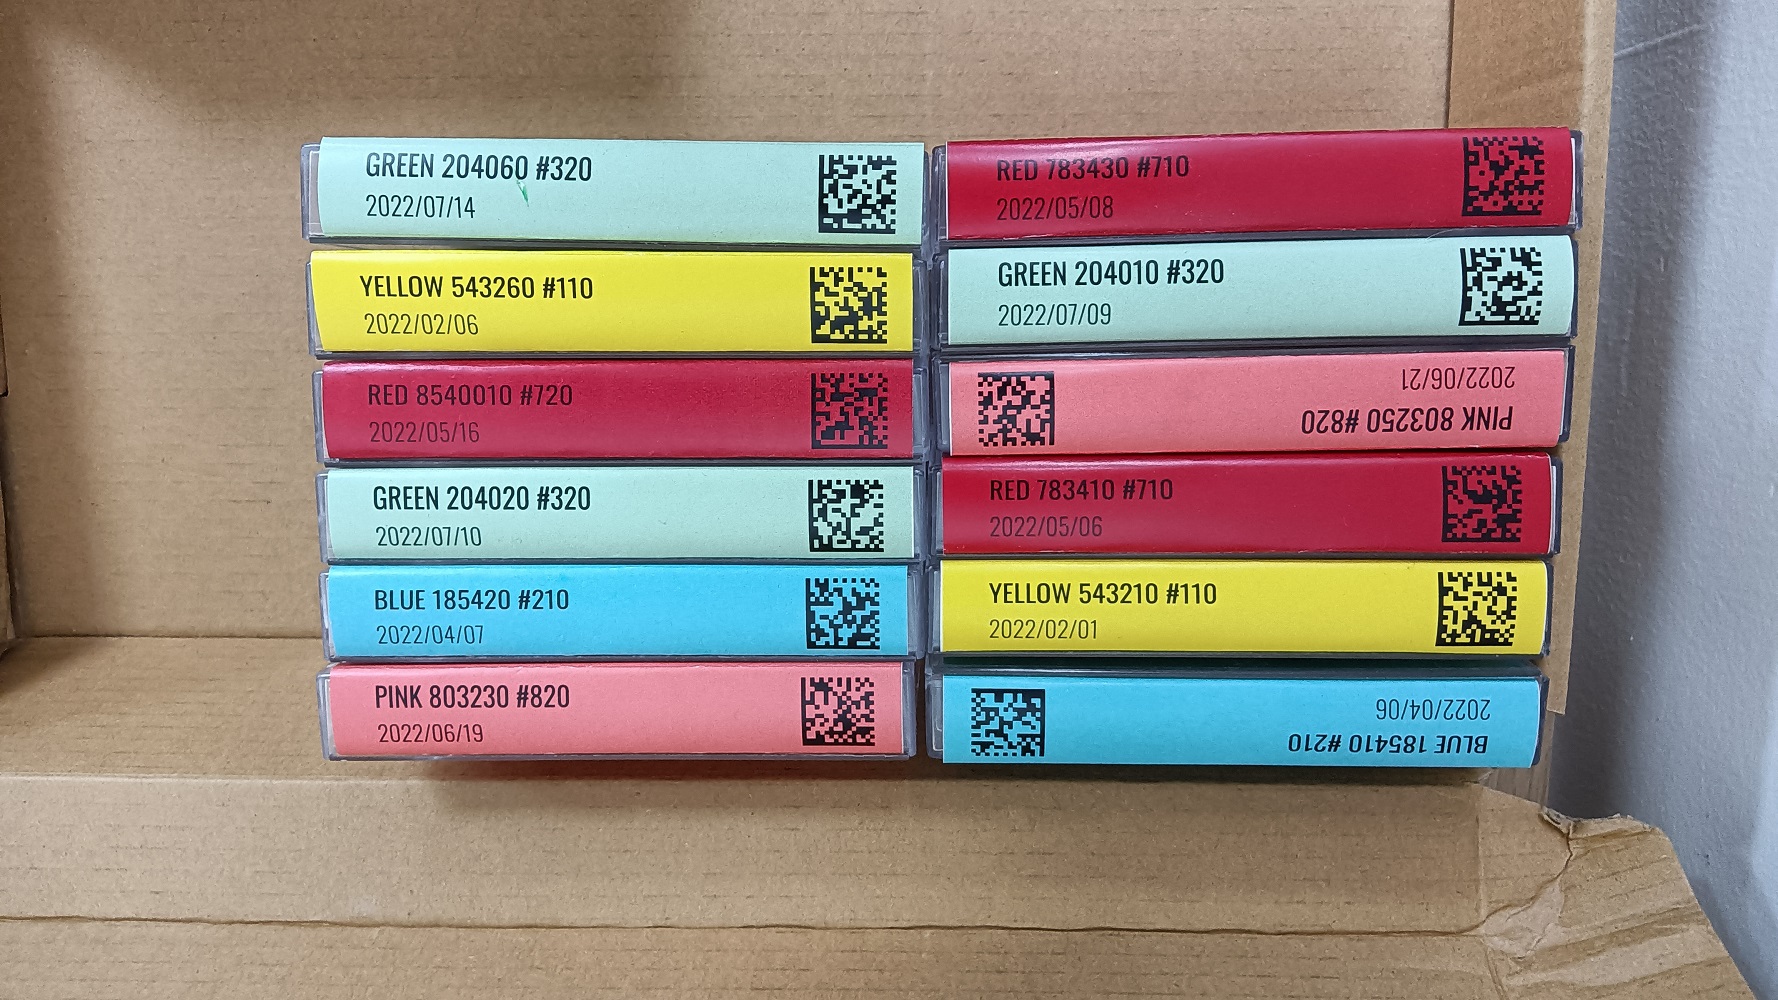
在下图中,DataMatrix码打印在颜色鲜明的磁带上。我们可以根据磁带的颜色对其进行检测。我们可以将图像转换到HSV色彩空间,并使用OpenCV的inrange方法进行分割。
-
将图像转换到HSV色彩空间。
hsv = cv2.cvtColor(image, cv2.COLOR_BGR2HSV) -
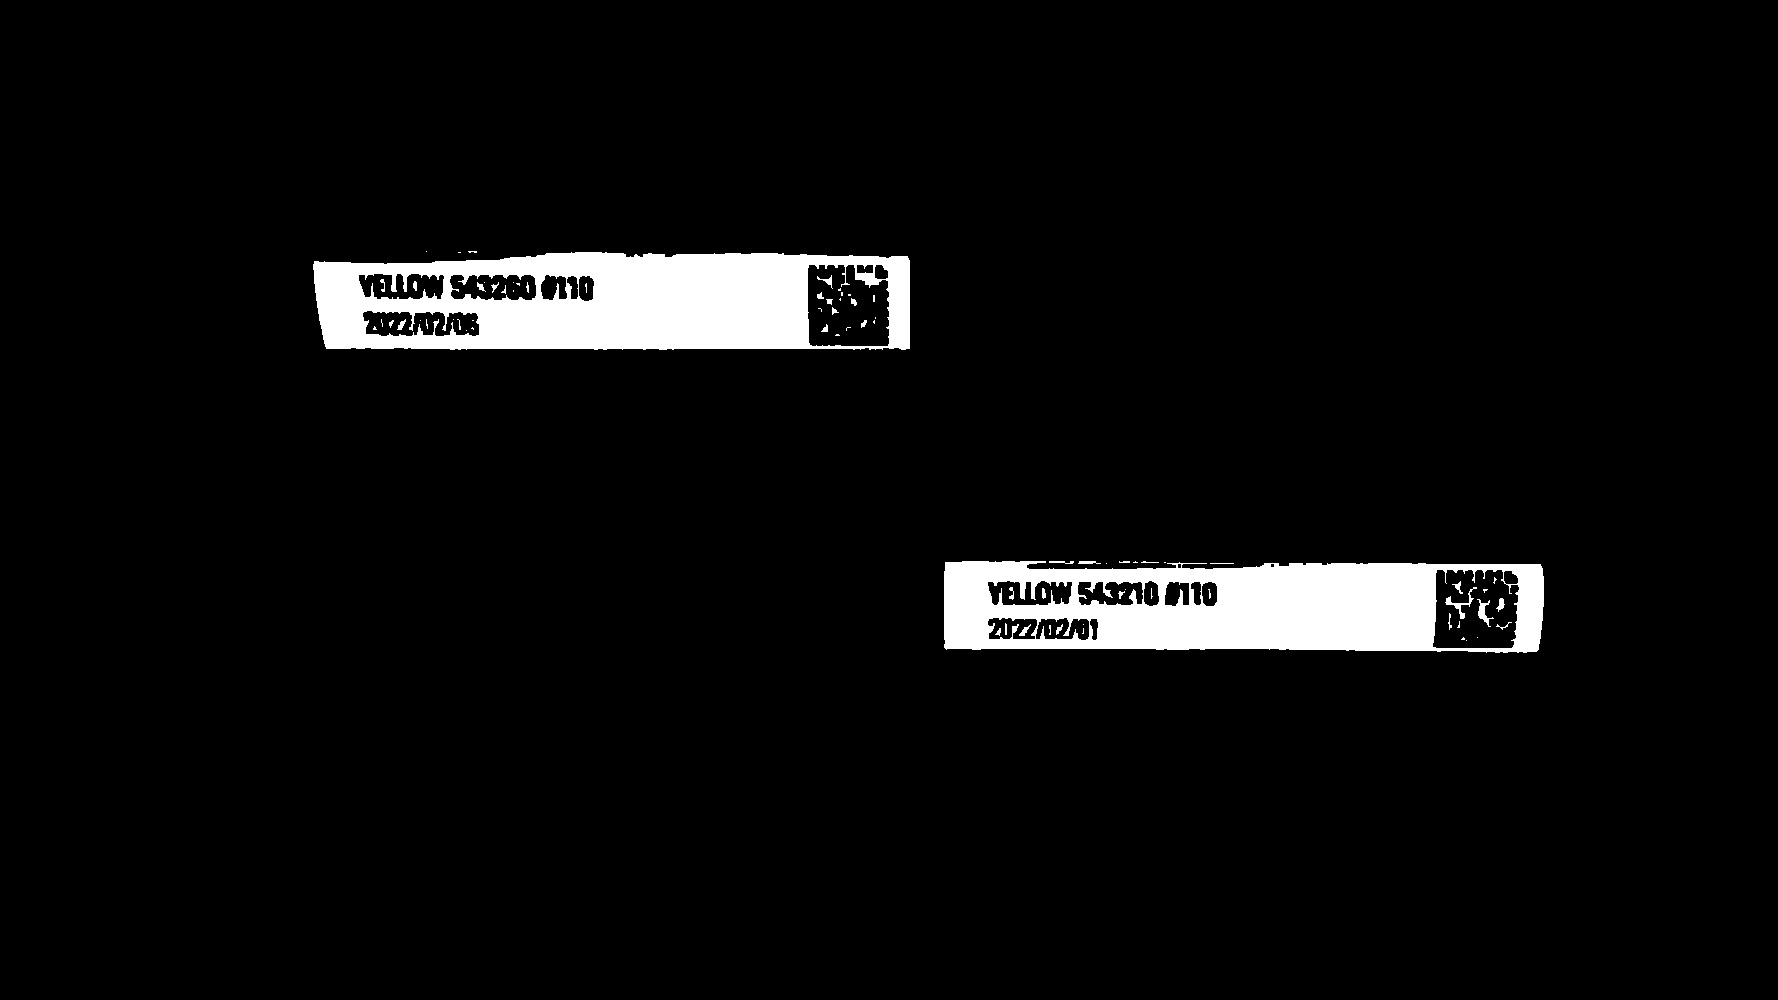
使用
inrange分出特定颜色。lower = np.array([26,120,150]) upper = np.array([34,255,255]) mask = cv2.inRange(hsv, lower, upper)下面是分割出的黄色磁带的掩膜。
以下是该图像中颜色的界限的字典。
colors_hsv = {
  "red": {
    "lower": np.array([156,150,100]),
    "upper": np.array([180,255,255])
  },
  "yellow": {
    "lower": np.array([26,120,150]),
    "upper": np.array([34,255,255])
  },
  "pink": {
    "lower": np.array([156,80,100]),
    "upper": np.array([180,140,255])
  },
  "green": {
    "lower": np.array([88,50,100]),
    "upper": np.array([99,80,255])
  },
  "blue": {
    "lower": np.array([78,120,100]),
    "upper": np.array([99,255,255])
  }
}
我们可以遍历这些颜色来检测所有磁带。
-
基于掩膜图像查找轮廓,过滤掉小的和不规则的轮廓,得到外接矩形。
contours, hierarchy = cv2.findContours(img,cv2.RETR_EXTERNAL,cv2.CHAIN_APPROX_SIMPLE) rects = [] height, width = img.shape for cnt in contours: rect = cv2.boundingRect(cnt) x, y, w, h = rect if w > 80 and h > 80 and w < width/2 and w>4*h: rects.append(rect) height, width, _ = original_image.shape min_x, min_y = width, height max_x = max_y = 0 for (x,y,w,h) in rects: min_x, max_x = min(x, min_x), max(x+w, max_x) min_y, max_y = min(y, min_y), max(y+h, max_y) cv2.rectangle(original_image, (x,y), (x+w,y+h), (255, 0, 0), 5)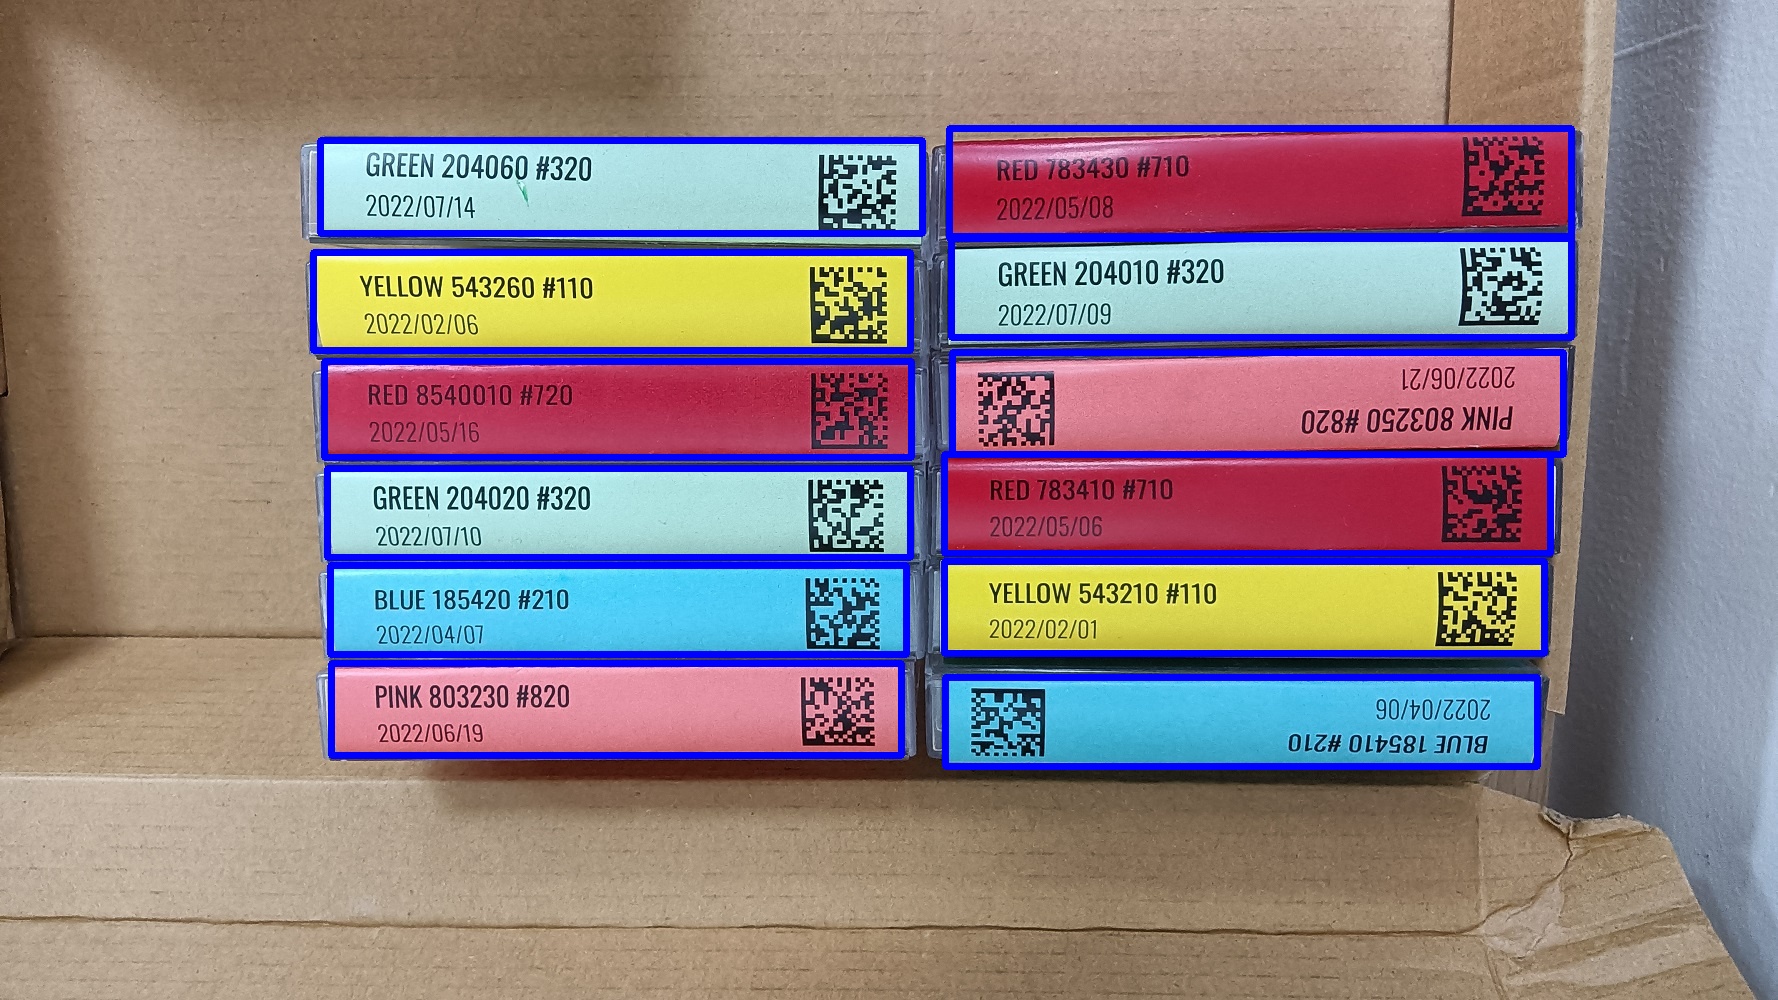 。
。
使用YOLO进行目标检测
下图中有五个瓶子。用简单的图像处理方法检测它们并不容易。我们可以使用深度学习方法YOLOv8来检测它们。
-
安装 YOLOv8。
pip install ultralytics -
使用以下代码检测瓶子。
from ultralytics import YOLO import cv2 model = YOLO("yolov8n.pt") img = cv2.imread("image.jpg") results = model.predict(source=img) -
将检测结果保存在列表中。
detections = [] for result in results: for box in result.boxes: xyxy = box.xyxy[0] detection = {} detection["x"] = int(xyxy[0]) detection["y"] = int(xyxy[1]) detection["w"] = int(xyxy[2]) - int(xyxy[0]) detection["h"] = int(xyxy[3]) - int(xyxy[1]) detection["confidence"] = float(box.conf) class_index = int(box.cls[0]) detection["class"] = model.names[class_index] detections.append(detection) -
画出结果。
for box in boxes:
    x = int(box["x"])
    y = int(box["y"])
    w = int(box["w"])
    h = int(box["h"])
    color = (255,0,0)
    cv2.rectangle(resized, (x, y), (x+w, y+h), color=color, thickness=2)
    cv2.putText(resized, box["class"], (x, y-10), cv2.FONT_HERSHEY_SIMPLEX, 0.9, (36,255,12), 2)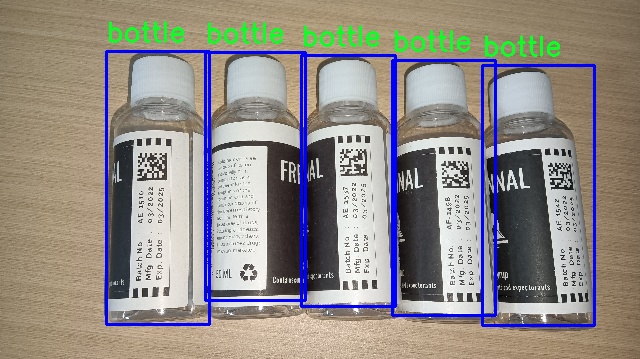
条码识别
检测到物体后,我们可以裁剪图像并读取上面的条码。我们使用Dynamsoft Barcode Reader来读取它们。
-
激活许可证。可以此处申请许可证。
error = BarcodeReader.init_license("DLS2eyJoYW5kc2hha2VDb2RlIjoiMjAwMDAxLTE2NDk4Mjk3OTI2MzUiLCJvcmdhbml6YXRpb25JRCI6IjIwMDAwMSIsInNlc3Npb25QYXNzd29yZCI6IndTcGR6Vm05WDJrcEQ5YUoifQ==") #one-day trial if error[0] != EnumErrorCode.DBR_OK: # Add your code for license error processing print("License error: "+ error[1]) -
创建一个新的BarcodeReader实例。
reader = BarcodeReader() -
示例图像中只有DataMatrix码,可以设置只读取DataMatrix格式的码。
settings = reader.get_runtime_settings() settings.barcode_format_ids = EnumBarcodeFormat.BF_DATAMATRIX reader.update_runtime_settings(settings) -
裁剪图像中的物体,读取其上的条码并绘制结果。
for box in boxes:
    has_barcodes = True
    box_image = img[box["y"]:box["y"]+box["h"],box["x"]:box["x"]+box["w"]]
    barcode_results = reader.decode_buffer(box_image)
    if barcode_results == None:
        has_barcodes = False

    color = (255,0,0)
    if has_barcodes == False:
        color = (0,0,255)

    cv2.rectangle(img, (x, y), (x+w, y+h), color=color, thickness=2)
如果某个物体没有识别到条码,则使用红色绘制其矩形。
源代码
可以在这里找到完整的代码:https://github.com/tony-xlh/object-detection-and-barcode-reading
参考
-
Dasiopoulou, Stamatia, et al. “Knowledge-assisted semantic video object detection.” IEEE Transactions on Circuits and Systems for Video Technology 15.10 (2005): 1210–1224. ↩