
ASP.NET Core是一个跨平台、高性能、开源的框架,用于构建支持现代的互联网应用程序。用它来构建Web API或者Web应用程序都非常方便。在本文中,我们将构建一个ASP.NET应用来裁剪文档图像。
主要提供以下API :
/api/document/detect:上传图像并获取检测到的文档边界/api/document/crop:依据提供的文档边界裁剪上传的文档图像/api/document/detectAndCrop:上传图像并获取裁剪后文档图像的ID/api/document/{ID}:根据ID获取上传的图片/api/document/cropped/{ID}:根据ID获取裁剪后的图像
还编写了一个前端界面来使用这些接口。
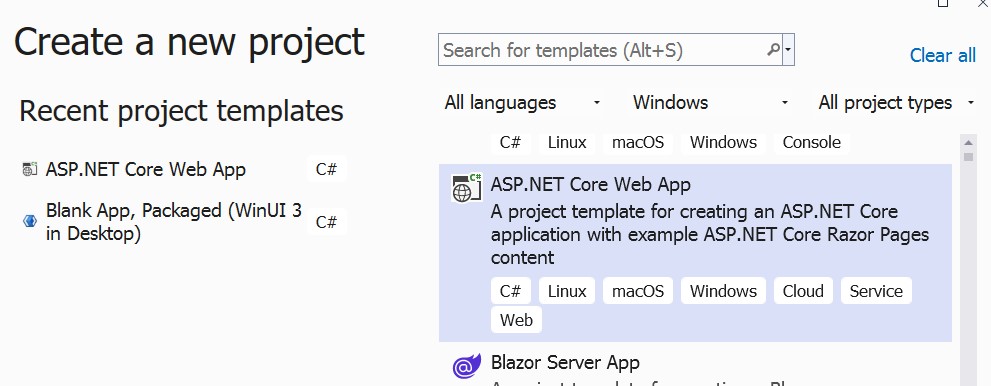
新建项目
使用Visual Studio创建新的ASP.NET Core Web App项目。
添加依赖项
从nuget安装Dynamsoft Document Normalizer。我们将使用它来检测文档边界并获取裁剪的文档图像。
dotnet add package Dynamsoft.DotNet.DocumentNormalizer.Bundle --version 2.2.1000
许可证初始化
在Program.cs中,初始化Dynamsoft Document Normalizer的许可证。可以在这里申请一个许可证。
using Dynamsoft.Core;
using Dynamsoft.License;

string errorMsg;
int errorCode = LicenseManager.InitLicense("DLS2eyJoYW5kc2hha2VDb2RlIjoiMjAwMDAxLTE2NDk4Mjk3OTI2MzUiLCJvcmdhbml6YXRpb25JRCI6IjIwMDAwMSIsInNlc3Npb25QYXNzd29yZCI6IndTcGR6Vm05WDJrcEQ5YUoifQ==", out errorMsg); //use a one-day trial license
if (errorCode != (int)EnumErrorCode.EC_OK)
{
    Console.WriteLine("License initialization error: " + errorMsg);
}
else
{
    Console.WriteLine("License valid.");
}
实现API
-
添加名为
DocumentController.cs的API Controller,并创建一个Capture Vision Router属性以调用Dynamsoft Document Normalizer。namespace DocumentScanner { [Route("api/[controller]")] [ApiController] public class DocumentController : ControllerBase { private CaptureVisionRouter cvr = new CaptureVisionRouter(); } }在
Program.cs中,映射控制器。app.MapControllers(); -
定义请求相关的类。
表示检测到的文档边界的多边形
Polygon和点Point。public class Polygon { public Point[] Points { get; set; } public Polygon() { Points = Array.Empty<Point>(); } } public class Point { public int X { get; set; } public int Y { get; set; } public Point(int x, int y) { X = x; Y = y; } }用于表示的文档的
Document类。它可以包含文档边界、base64编码的图像数据、用于在磁盘上存储图像的ID以及成功状态。public class Document { public string? Base64 { get; set; } public Polygon? Polygon { get; set; } public bool? Success { get; set; } public long? ID { get; set; } } -
添加检测文档边界的方法。
[HttpPost("detect")] public ActionResult<Document> DetectDocument(Document document) { Document detectedDocument = new Document(); if (document.Base64 != null) { byte[] bytes = Convert.FromBase64String(document.Base64); CapturedResult result = cvr.Capture(bytes, PresetTemplate.PT_DETECT_DOCUMENT_BOUNDARIES); DetectedQuadsResult quads = result.GetDetectedQuadsResult(); if (quads != null && quads.GetItems().Length > 0) { Polygon polygon = ConvertToPolygon(quads.GetItems()[0].GetLocation()); detectedDocument.Polygon = polygon; } long ID = SaveImage(bytes); detectedDocument.ID = ID; detectedDocument.Success = true; } return detectedDocument; } private Polygon ConvertToPolygon(Quadrilateral quad) { Polygon polygon = new Polygon(); Point[] points = new Point[4]; points[0] = new Point(quad.points[0][0], quad.points[0][1]); points[1] = new Point(quad.points[1][0], quad.points[1][1]); points[2] = new Point(quad.points[2][0], quad.points[2][1]); points[3] = new Point(quad.points[3][0], quad.points[3][1]); polygon.Points = points; return polygon; } private long SaveImage(byte[] bytes) { if (Directory.Exists("images") == false) { Directory.CreateDirectory("images"); } DateTimeOffset dateTimeOffset = DateTimeOffset.UtcNow; long ID = dateTimeOffset.ToUnixTimeMilliseconds(); string filePath; filePath = "./images/" + ID + ".jpg"; using (FileStream fs = new FileStream(filePath, FileMode.Create)) { fs.Write(bytes, 0, bytes.Length); } return ID; } -
添加根据指定的文档边界裁剪文档图像的方法。
[HttpPost("crop")] public ActionResult<Document> CropDocument(Document document) { Document croppedDocument = new Document(); if (document.ID != null && document.Polygon != null) { string filePath = "./images/" + document.ID + ".jpg"; SimplifiedCaptureVisionSettings settings; cvr.GetSimplifiedSettings(PresetTemplate.PT_NORMALIZE_DOCUMENT, out settings); settings.roiMeasuredInPercentage = 0; settings.roi = ConvertToQuad(document.Polygon); string errorMsg; cvr.UpdateSettings(PresetTemplate.PT_NORMALIZE_DOCUMENT, settings, out errorMsg); CapturedResult result = cvr.Capture(filePath, PresetTemplate.PT_NORMALIZE_DOCUMENT); NormalizedImagesResult normalizedImagesResult = result.GetNormalizedImagesResult(); if (normalizedImagesResult.GetItems().Length > 0) { ImageData imageData = normalizedImagesResult.GetItems()[0].GetImageData(); ImageManager imageManager = new ImageManager(); if (imageData != null) { int errorCode = imageManager.SaveToFile(imageData, "./images/" + document.ID + "-cropped.jpg"); if (errorCode == 0) { croppedDocument.ID = document.ID; croppedDocument.Success = true; } } } } return croppedDocument; } private Quadrilateral ConvertToQuad(Polygon polygon) { Quadrilateral quadrilateral = new Quadrilateral(); quadrilateral.points[0] = new Dynamsoft.Core.Point(polygon.Points[0].X, polygon.Points[0].Y); quadrilateral.points[1] = new Dynamsoft.Core.Point(polygon.Points[1].X, polygon.Points[1].Y); quadrilateral.points[2] = new Dynamsoft.Core.Point(polygon.Points[2].X, polygon.Points[2].Y); quadrilateral.points[3] = new Dynamsoft.Core.Point(polygon.Points[3].X, polygon.Points[3].Y); return quadrilateral; } -
添加检测文档边界和裁剪文档图像的方法。
[HttpPost("detectAndCrop")] public ActionResult<Document> DetectAndCropDocument(Document document) { Document croppedDocument = new Document(); if (document.Base64 != null) { byte[] bytes = Convert.FromBase64String(document.Base64); CapturedResult result = cvr.Capture(bytes, PresetTemplate.PT_DETECT_AND_NORMALIZE_DOCUMENT); NormalizedImagesResult normalizedImagesResult = result.GetNormalizedImagesResult(); if (normalizedImagesResult != null && normalizedImagesResult.GetItems().Length > 0) { DateTimeOffset dateTimeOffset = DateTimeOffset.UtcNow; long ID = dateTimeOffset.ToUnixTimeMilliseconds(); ImageData imageData = normalizedImagesResult.GetItems()[0].GetImageData(); ImageManager imageManager = new ImageManager(); if (imageData != null) { int errorCode = imageManager.SaveToFile(imageData, "./images/" + ID + "-cropped.jpg"); if (errorCode == 0) { croppedDocument.ID = ID; croppedDocument.Success = true; } } } } return croppedDocument; } -
添加获取上传的和裁剪的图像的方法。
[HttpGet("{ID}")]
public ActionResult<string> GetDocument(long ID)
{
    string filePath = "./images/"+ID+".jpg";
    Response.ContentType = "text/plain";
    if (System.IO.File.Exists(filePath))
    {
        byte[] bytes = System.IO.File.ReadAllBytes(filePath);
        string base64String = Convert.ToBase64String(bytes);
        Response.StatusCode = 200;
        return base64String;
    }
    else {
        Response.StatusCode = 404;
        return "not found";
    }
}

[HttpGet("cropped/{ID}")]
public ActionResult<string> GetCroppedDocument(long ID)
{
    string filePath = "./images/" + ID + "-cropped.jpg";
    Response.ContentType = "text/plain";
    if (System.IO.File.Exists(filePath))
    {
        byte[] bytes = System.IO.File.ReadAllBytes(filePath);
        string base64String = Convert.ToBase64String(bytes);
        Response.StatusCode = 200;
        return base64String;
    }
    else
    {
        Response.StatusCode = 404;
        return "not found";
    }
}
进行测试
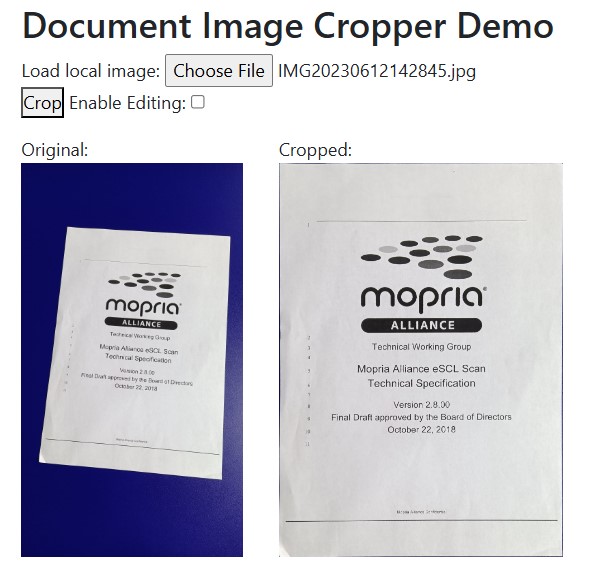
然后,我们可以编写一个网页,使用AJAX测试API :
let url = "/api/document/detectAndCrop";
let dataURL = document.getElementById("original").src; //an image element's dataURL
let base64 = dataURL.substring(dataURL.indexOf(",")+1,dataURL.length);
data = {Base64:base64};
const response = await fetch(url, {
  method: "POST",
  headers: {
    "Content-Type": "application/json",
  },
  body: JSON.stringify(data),
});
let json = await response.json();

let imageID = json.id;
if (json.success == true) {
  let response = await fetch("/api/document/cropped/"+imageID);
  let base64 = await response.text();
  displayCropped(base64);
}else{
  alert("Failed to get the cropped Image.");
}
可以在源码仓库里中找到一个功能更全面的示例,它可以编辑检测到的多边形。
启用CORS
如果需要跨域调用API ,需要启用CORS。
-
在
Program.cs中启用CORS。builder.Services.AddCors(); app.UseCors(builder => { builder.AllowAnyOrigin() .AllowAnyMethod() .AllowAnyHeader(); }); -
如果我们需要通过局域网访问它,则还需要添加
Access-Control-Allow-Private-Network的header。// Enable PNA preflight requests app.Use(async (ctx, next) => { if (ctx.Request.Method.Equals("options", StringComparison.InvariantCultureIgnoreCase) && ctx.Request.Headers.ContainsKey("Access-Control-Request-Private-Network")) { ctx.Response.Headers.Add("Access-Control-Allow-Private-Network", "true"); } await next(); });
源代码
该项目的源代码可在此处获得:https://github.com/tony-xlh/Capture-Vision-Server-Demos/tree/main/Document-Normalizer/ASP.NET