
Expo是一个开源平台,使用JavaScript和React为Android、iOS和Web制作通用原生应用程序。它是一组构建在React Native之上的工具,可以轻松地开发和分发应用程序。
在本文中,我们将使用Expo构建一个文档扫描应用。它可以通过摄像头检测文档边界并裁剪文档图像,或者从文档扫描仪获取文档图像。
演示视频:
使用的SDK
- Dynamsoft Document Normalizer,它提供了文档边界检测和校正的功能。
- Dynamsoft Service,Dynamic Web TWAIN的内部服务,它提供一个REST API,可以访问文档扫描仪。
新建项目
-
创建一个新的Expo项目:
npx create-expo-app DocumentScanner -
在
app.json中添加相机权限:"ios": { "infoPlist": { "NSCameraUsageDescription": "This app uses the camera to scan barcodes." } }, "android": { "permissions": ["android.permission.CAMERA","android.permission.INTERNET"] } -
添加依赖项:
npx expo install react-native-webview expo-camera react-native-safe-area-context expo-sharing expo-file-system
设计主页
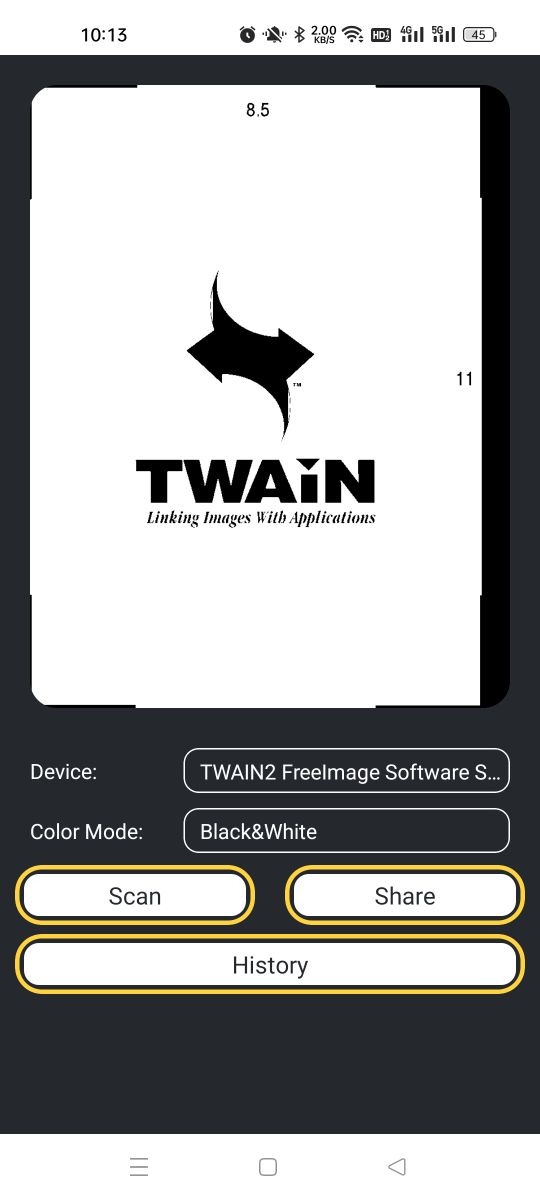
更新App.js,添加用于显示扫描图像的Image元素、用于扫描文档的按钮、用于共享文档图像的按钮、用于查看历史记录的按钮以及用于选择扫描设备和颜色模式的两个选项。
有三种颜色模式:黑白、灰色和彩色。设备列表包括摄像头和连接的文档扫描仪。
import { StatusBar } from 'expo-status-bar';
import { useState,useEffect, useRef } from 'react';
import { StyleSheet, View, Image, Text } from 'react-native';
import Button from './components/Button';
import Select from './components/Select';
import { SafeAreaView, SafeAreaProvider  } from 'react-native-safe-area-context';

const PlaceholderImage = require('./assets/thumbnail.png');
const colorModes = ["Black&White","Gray","Color"];

export default function App() {
  const path = useRef("");
  const [devices,setDevices] = useState(["Camera"]);
  const [selectedDeviceIndex,setSelectedDeviceIndex] = useState(0);
  const [selectedColorMode,setSelectedColorMode] = useState("Color");
  const [image,setImage] = useState(PlaceholderImage);

  const renderBody = () => {
    return (
      <View style={styles.home}>
        <View style={styles.imageContainer}>
          <Image source={image} style={styles.image} />
        </View>
        <View style={styles.footerContainer}>
          <View style={styles.option}>
            <Text style={styles.label}>Device:</Text>
            <Select style={styles.select} label={devices[selectedDeviceIndex]}></Select>
          </View>
          <View style={styles.option}>
            <Text style={styles.label}>Color Mode:</Text>
            <Select style={styles.select} label={selectedColorMode} ></Select>
          </View>
          <View style={styles.buttons}>
            <View style={styles.buttonContainer}>
              <Button label="Scan" onPress={()=>scan()} />
            </View>
            <View style={styles.buttonContainer}>
              <Button style={styles.button} label="Share" onPress={()=>share()} />
            </View>
          </View>
          <View>
            <Button style={styles.button} label="History"/>
          </View>
        </View>
      </View>
    )
  }

  return (
    <SafeAreaProvider>
      <SafeAreaView style={styles.container}>
        {renderBody()}
        <StatusBar style="auto"/>
      </SafeAreaView>
    </SafeAreaProvider>
  );
}

const styles = StyleSheet.create({
  container: {
    flex: 1,
  },
  button:{
    marginBottom: 5,
  },
  buttons: {
    flexDirection:"row",
  },
  buttonContainer:{
    width:"50%",
  },
  home: {
    flex: 1,
    width: "100%",
    backgroundColor: '#25292e',
    alignItems: 'center',
  },
  footerContainer: {
    flex: 3 / 5,
    width: "100%",
  },
  option:{
    flexDirection:"row",
    alignItems:"center",
    marginHorizontal: 20,
    height: 40,
  },
  label:{
    flex: 3 / 7,
    color: 'white',
    marginRight: 10,
  },
  select:{
    flex: 1,
  },
  imageContainer: {
    flex: 1,
    paddingTop: 20,
    alignItems:"center",
  },
  image: {
    width: 320,
    height: "95%",
    borderRadius: 18,
    resizeMode: "contain",
  },
});
还定义了两个自定义组件。
components/Button.js :
import { StyleSheet, View, Pressable, Text } from 'react-native';

export default function Button({ label, onPress }) {
  return (
    <View
      style={[styles.buttonContainer, { borderWidth: 3, borderColor: "#ffd33d", borderRadius: 18 }]}
      >
        <Pressable
          style={[styles.button, { backgroundColor: "#fff" }]}
          onPress={onPress}
        >
          <Text style={[styles.buttonLabel, { color: "#25292e" }]}>{label}</Text>
        </Pressable>
    </View>
  );
}

const styles = StyleSheet.create({
  buttonContainer: {
    width: "auto",
    marginHorizontal: 10,
    height: 40,
    alignItems: 'center',
    justifyContent: 'center',
    padding: 3,
    margin: 3,
  },
  button: {
    borderRadius: 10,
    width: '100%',
    height: '100%',
    alignItems: 'center',
    justifyContent: 'center',
    flexDirection: 'row',
  },
  buttonIcon: {
    paddingRight: 8,
  },
  buttonLabel: {
    color: '#fff',
    fontSize: 16,
  },
});
components/Select.js :
import { StyleSheet, View, Pressable, Text } from 'react-native';

export default function Select({ label, onPress }) {
  return (
    <View
      style={[styles.container]}
      >
        <Pressable
          style={[styles.button]}
          onPress={onPress}
        >
          <Text ellipsizeMode="tail" numberOfLines={1} style={[styles.label]}>{label}</Text>
        </Pressable>
    </View>
  );
}

const styles = StyleSheet.create({
  container: {
    flex:1,
    borderWidth: 1,
    borderColor: "white",
    borderRadius: 10,
    height: 30,
    justifyContent:"center",
  },
  label:{
    marginLeft: 10,
    color: "white",
  }
});
定义一个项目选取组件
创建选取列表项目的新组件。我们可以用它来选择使用哪个设备,使用哪种颜色模式,采取哪种操作等等。
import { View, Text, Pressable, StyleSheet } from 'react-native';

export default function ItemsPicker({ items,onPress }) {
  return (
    <View style={styles.container}>
      <Text style={{color: "white"}}>Select an item:</Text>
      {items.map((item, idx) => (
        <Pressable key={idx} onPress={()=>onPress(item,idx)}>
          <Text style={styles.item}>{item}</Text>
        </Pressable>
      ))}
    </View>
  );
}

const styles = StyleSheet.create({
  container: {
    flex:1,
    paddingTop: 20,
    paddingLeft: 20,
    alignItems: 'flex-start',
    backgroundColor: 'black',
  },
  item: {
    color: "white",
    padding: 10,
    fontSize: 18,
    height: 44,
  },
});
然后,在App.js中,我们可以使用它配置扫描行为。
const [showDevicePicker,setShowDevicePicker] = useState(false);
const [showColorModePicker,setShowColorModePicker] = useState(false);
const renderBody = () => {
  if (showDevicePicker) {
    return (
      <ItemsPicker items={devices} onPress={(device,idx) => {
        console.log(device);
        setSelectedDeviceIndex(idx);
        setShowDevicePicker(false);
      }}></ItemsPicker>
    )
  }
  if (showColorModePicker) {
    return (
      <ItemsPicker items={colorModes} onPress={(mode) => {
        setSelectedColorMode(mode);
        setShowColorModePicker(false);
      }}></ItemsPicker>
    )
  }
}
从摄像头扫描文档
接下来,我们将添加从摄像头扫描文档的功能。
-
在
components下创建一个名为DocumentScanner.js的新组件。import { StyleSheet, View } from 'react-native'; import { useEffect,useState } from 'react'; export default function DocumentScanner(props) { return <View/> } } const styles = StyleSheet.create({ }); -
组件挂载后,使用
expo camera请求摄像头权限。const [hasPermission, setHasPermission] = useState(null); useEffect(() => { (async () => { const { status } = await Camera.requestCameraPermissionsAsync(); setHasPermission(status === "granted"); })(); }, []); -
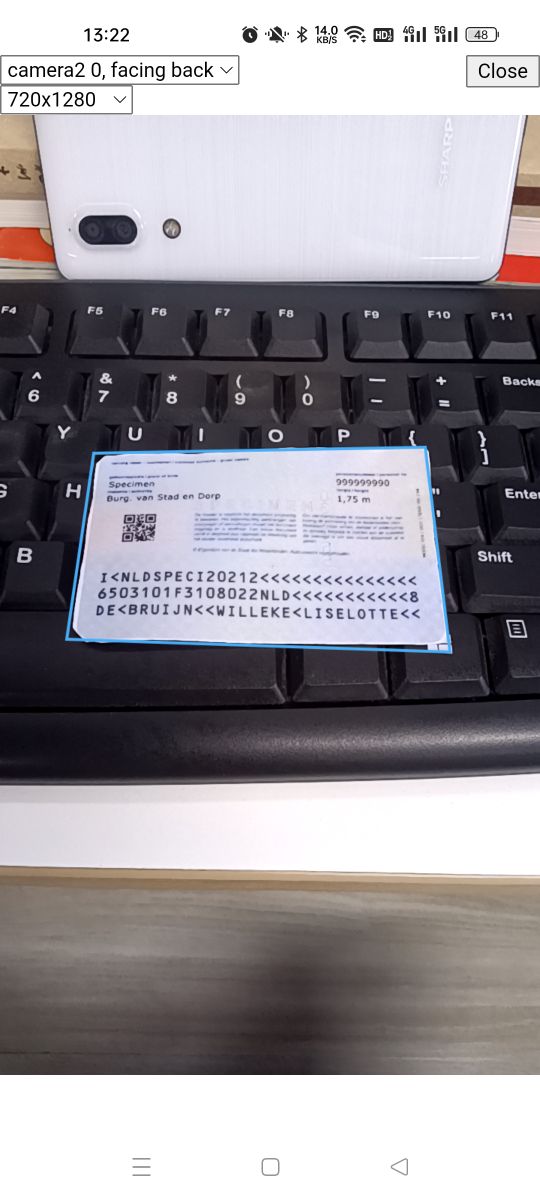
如果授予了摄像头权限,使用react-native-webview加载基于Dynamsoft Camera Enhancer和Dynamsoft Document Normalizer编写的文档扫描Web应用。这个Web应用是为在react-native-webview中使用而构建的。它可以将扫描的文档图像作为dataURL发送给React Native。我们可以通过URL参数来配置其行为,如颜色模式和许可证。需要许可证才能使用Dynamsoft Document Normalizer。可以在此处申请一个许可证。
const getURI = () => { let URI = 'https://tony-xlh.github.io/Vanilla-JS-Document-Scanner-Demos/react-native/?autoStart=true'; if (props.colorMode == "Black&White") { URI = URI + "&colorMode="+0; }else if (props.colorMode == "Gray"){ URI = URI + "&colorMode="+1; }else{ URI = URI + "&colorMode="+2; } if (props.license) { URI = URI + "&license="+props.license; } return URI; } if (hasPermission) { return ( <WebView style={styles.webview} allowsInlineMediaPlayback={true} mediaPlaybackRequiresUserAction={false} onMessage={(event) => { if (!event.nativeEvent.data) { if (props.onClosed) { props.onClosed(); } }else{ if (props.onScanned) { const dataURL = event.nativeEvent.data; props.onScanned(dataURL); } } }} source={{ uri: getURI() }} /> ); }else{ return <Text>No permission.</Text> } -
用户按下扫描按钮并且所选设备为摄像头后,显示这个扫描组件。如果连续检测到三个重叠的文档区域,它将自动捕获图像。图像将保存到应用程序的文档目录中,并显示在页面中。
const path = useRef("");
const [showScanner,setShowScanner] = useState(false);
const onScanned = async (dataURL) => {
  const timestamp = new Date().getTime();
  path.current = FileSystem.documentDirectory + timestamp + ".png";
  const base64Code = removeDataURLHead(dataURL);
  await FileSystem.writeAsStringAsync(path.current, base64Code, {
    encoding: FileSystem.EncodingType.Base64,
  });
  setImage({uri: path.current});
  setShowScanner(false);
}

const removeDataURLHead = (dataURL) => {
  return dataURL.substring(dataURL.indexOf(",")+1,dataURL.length);
}

const renderBody = () => {
  if (showScanner) {
    return (
      <DocumentScanner
        license="DLS2eyJoYW5kc2hha2VDb2RlIjoiMTAwMjI3NzYzLVRYbFhaV0pRY205cSIsIm1haW5TZXJ2ZXJVUkwiOiJodHRwczovL21sdHMuZHluYW1zb2Z0LmNvbSIsIm9yZ2FuaXphdGlvbklEIjoiMTAwMjI3NzYzIiwic3RhbmRieVNlcnZlclVSTCI6Imh0dHBzOi8vc2x0cy5keW5hbXNvZnQuY29tIiwiY2hlY2tDb2RlIjotMzg1NjA5MTcyfQ=="
        colorMode={selectedColorMode}
        onScanned={(dataURL)=>onScanned(dataURL)}
      ></DocumentScanner>
    )
  }
}
屏幕截图:
这里,我们使用react-native-webview来集成基于摄像头的文档扫描功能,以便于在Expo Go中运行。如果希望以原生方式集成该功能,可以使用另一个原生模块。
从扫描仪扫描文档
接下来,我们将通过Dynamsoft Service的REST API从文档扫描仪扫描文档。
- 在连接到文档扫描仪的PC上安装Dynamsoft Service,并使其可以在局域网中被访问到。可以在配置页面上配置其IP。下载链接可以在此处找到。
-
创建一个DynamsoftService类,用于通过REST API获取扫描仪列表并通过从扫描仪获取图像。
export class DynamsoftService { endpoint; license; constructor(endpoint,license) { this.endpoint = endpoint; this.license = license; } async getDevices(){ const url = this.endpoint + "/DWTAPI/Scanners"; const response = await fetch(url, {"method":"GET", "mode":"cors", "credentials":"include"}); let scanners = await response.json(); return scanners; } async acquireImage(device,pixelType){ let url = this.endpoint + "/DWTAPI/ScanJobs"; let scanParams = { license:this.license }; if (device) { // optional. use the latest device. scanParams.device = device; } scanParams.config = { IfShowUI: false, Resolution: 200, IfFeederEnabled: false, IfDuplexEnabled: false, }; scanParams.caps = {}; scanParams.caps.exception = "ignore"; scanParams.caps.capabilities = [ { capability: 257, // pixel type curValue: pixelType } ] const response = await fetch(url, {"body": JSON.stringify(scanParams), "method":"POST", "mode":"cors", "credentials":"include"}); if (response.status == 201) { curJobid = await response.text(); return (await this.getImage(curJobid)); }else{ let message = await response.text(); throw new Error(message); } } async getImage(jobid) { // get image. const url = this.endpoint + "/DWTAPI/ScanJobs/" + jobid + '/NextDocument'; const response = await fetch(url, {"method":"GET", "mode":"cors", "credentials":"include"}); if (response.status === 200) { const image = await response.blob(); return this.blobToBase64(image); } } blobToBase64( blob ) { return new Promise((resolve, reject) => { const reader = new FileReader(); reader.readAsDataURL(blob); reader.onloadend = () => { const uri = reader.result?.toString(); resolve(uri); }; }) } } -
在
App.js中,通过REST API获取扫描仪列表。需要许可证才能使用它。可以在此处申请一个许可证。export default function App() { const service = useRef(); const scanners = useRef(); const [devices,setDevices] = useState(["Camera"]); useEffect(() => { service.current = new DynamsoftService("http://192.168.8.65:18622","LICENSE"); fetchDevicesList(); }, []); const fetchDevicesList = async () =>{ scanners.current = await service.current.getDevices(); let newDevices = ["Camera"]; for (let index = 0; index < scanners.current.length; index++) { const scanner = scanners.current[index]; newDevices.push(scanner.name); } setDevices(newDevices); } } -
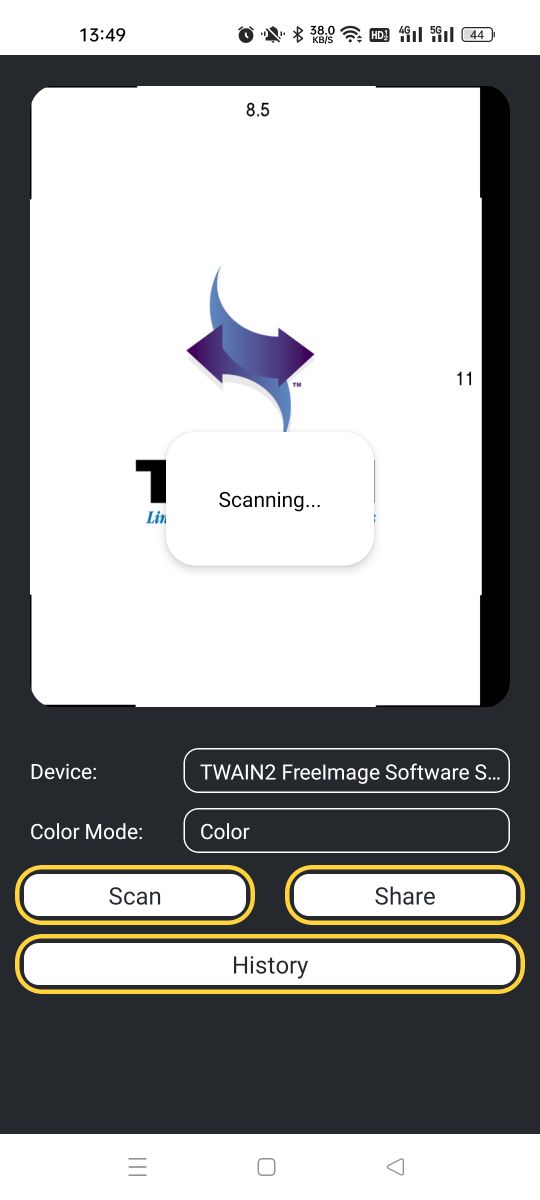
按下扫描按钮后获取文档图像。
const scan = async () => { if (selectedDeviceIndex == 0) { setShowScanner(true); }else{ setModalVisible(true); const selectedScanner = scanners.current[selectedDeviceIndex - 1]; const pixelType = colorModes.indexOf(selectedColorMode); const image = await service.current.acquireImage(selectedScanner.device,pixelType); onScanned(image); setModalVisible(false); } } -
扫描过程中将显示一个模态框,表示正在扫描。
const [modalVisible, setModalVisible] = useState(false);
return (
  <View style={styles.home}>
    <Modal
      transparent={true}
      visible={modalVisible}
      >
      <View style={styles.centeredView}>
        <View style={styles.modalView}>
          <Text>Scanning...</Text>
        </View>
      </View>
    </Modal>
  </View>
)
屏幕截图:
管理历史记录
新建一个components/HistoryBrowser.js组件文件,用于管理扫描的文档。
import { Alert, StyleSheet, View, Text, FlatList, Image,Button,Pressable,Dimensions } from 'react-native';
import { useEffect,useState,useRef } from 'react';
import ItemsPicker from './ItemsPicker';
import * as Sharing from 'expo-sharing';
import * as FileSystem from 'expo-file-system';

const width = Dimensions.get('window').width;
const height = Dimensions.get('window').height;
const actions = ["Delete","Share","Get info","Cancel"];

export default function HistoryBrowser(props) {
  const [images,setImages] = useState([]);
  const [showActionPicker,setShowActionPicker] = useState(false);
  const pressedImageName = useRef("");
  useEffect(() => {
    console.log(width);
    console.log(height);
    readImagesList();
  }, []);

  const readImagesList = async () => {
    let newImages = [];
    const files = await FileSystem.readDirectoryAsync(FileSystem.documentDirectory);
    for (let index = 0; index < files.length; index++) {
      const file = files[index];
      if (file.toLowerCase().endsWith(".png")) {
        newImages.push(file);
      }
    }
    setImages(newImages);
  }

  const getURI = (filename) => {
    const uri = FileSystem.documentDirectory + filename;
    return uri;
  }

  const goBack = () => {
    if (props.onBack) {
      props.onBack();
    }
  }

  const deleteFile = async () => {
    if (pressedImageName.current != "") {
      setImages([]);
      const path = FileSystem.documentDirectory + pressedImageName.current;
      await FileSystem.deleteAsync(path);
      pressedImageName.current = "";
      readImagesList();
    }
  }

  const share = () => {
    if (pressedImageName.current != "") {
      const path = FileSystem.documentDirectory + pressedImageName.current;
      Sharing.shareAsync(path);
    }
  }

  const getInfo = async () => {
    if (pressedImageName.current != "") {
      const path = FileSystem.documentDirectory + pressedImageName.current;
      const info = await FileSystem.getInfoAsync(path);
      const time = new Date(info.modificationTime*1000);
      let message = "Time: " + time.toUTCString() + "\n";
      message = message + "Size: " + info.size/1000 + "KB";
      Alert.alert(pressedImageName.current,message);

    }

  }

  return (
    <View style={styles.container}>
      {showActionPicker && (
        <View style={styles.pickerContainer}>
          <ItemsPicker items={actions} onPress={(action) => {
            console.log(action);
            setShowActionPicker(false);
            if (action === "Delete") {
              deleteFile();
            }else if (action === "Share"){
              share();
            }else if (action === "Get info"){
              getInfo();
            }
          }}></ItemsPicker>
        </View>
      )
      }
      <View style={styles.backButtonContainer} >
        <Button title="< Back" onPress={goBack}></Button>
      </View>
      <FlatList
        horizontal={true}
        style={styles.flat}
        data={images}
        renderItem={({item}) =>
          <Pressable onPress={()=>{
            pressedImageName.current = item;
            setShowActionPicker(true);
          }}>
            <Image style={styles.image} source={{
              uri: getURI(item),
            }}/>
          </Pressable>}
      />
    </View>
  )
}

const styles = StyleSheet.create({
  container:{
    flex: 1,
    backgroundColor: "#25292e",
    alignItems:"center",
  },
  image: {
    width: width*0.9,
    height: height*0.9,
    resizeMode: "contain",
  },
  pickerContainer:{
    position: "absolute",
    top: 0,
    left: 0,
    width: "100%",
    height: "100%",
    zIndex: 20,
  },
  backButtonContainer:{
    position:"absolute",
    top: 0,
    left: 0,
    zIndex: 10,
  }
});
源代码
示例应用编写完成了。欢迎下载源代码并尝试使用:https://github.com/tony-xlh/expo-document-scanner