使用getUserMedia API ,我们可以使用JavaScript在Web应用中调用摄像头。大多数浏览器都支持此功能, Chrome Android还额外支持控制摄像头的缩放、手电筒、对焦等能力,为制作摄像头网页应用提供了更多可能性。
在本文中,我们将讨论如何在Web应用中控制摄像头对焦。会编写两个demo,一个直接调用getUserMedia,一个使用Dynamsoft Camera Enhancer。
getUserMedia可以控制对焦模式和对焦距离,但不提供“触摸对焦”功能。Dynamsoft Camera Enhancer可通过计算图像对比度来实现“触摸对焦”。
对焦的工作原理
光线通过摄像头的镜头反射进入传感器,这样我们就可以捕捉到比传感器大得多的景物。

对焦距离是镜头与物体之间的距离。我们可以调整镜头的位置以修改对焦距离,从而获得清晰的目标图像。
计算合适的对焦距离的过程叫做自动对焦。有很多方法可以做到这一点,比如感应距离和计算对比度。
控制对焦的必要性
当我们在浏览器中打开摄像头时,默认情况下会启用自动对焦。如果对焦失败或需要关闭自动对焦并保持对焦距离,我们可以手动控制对焦。
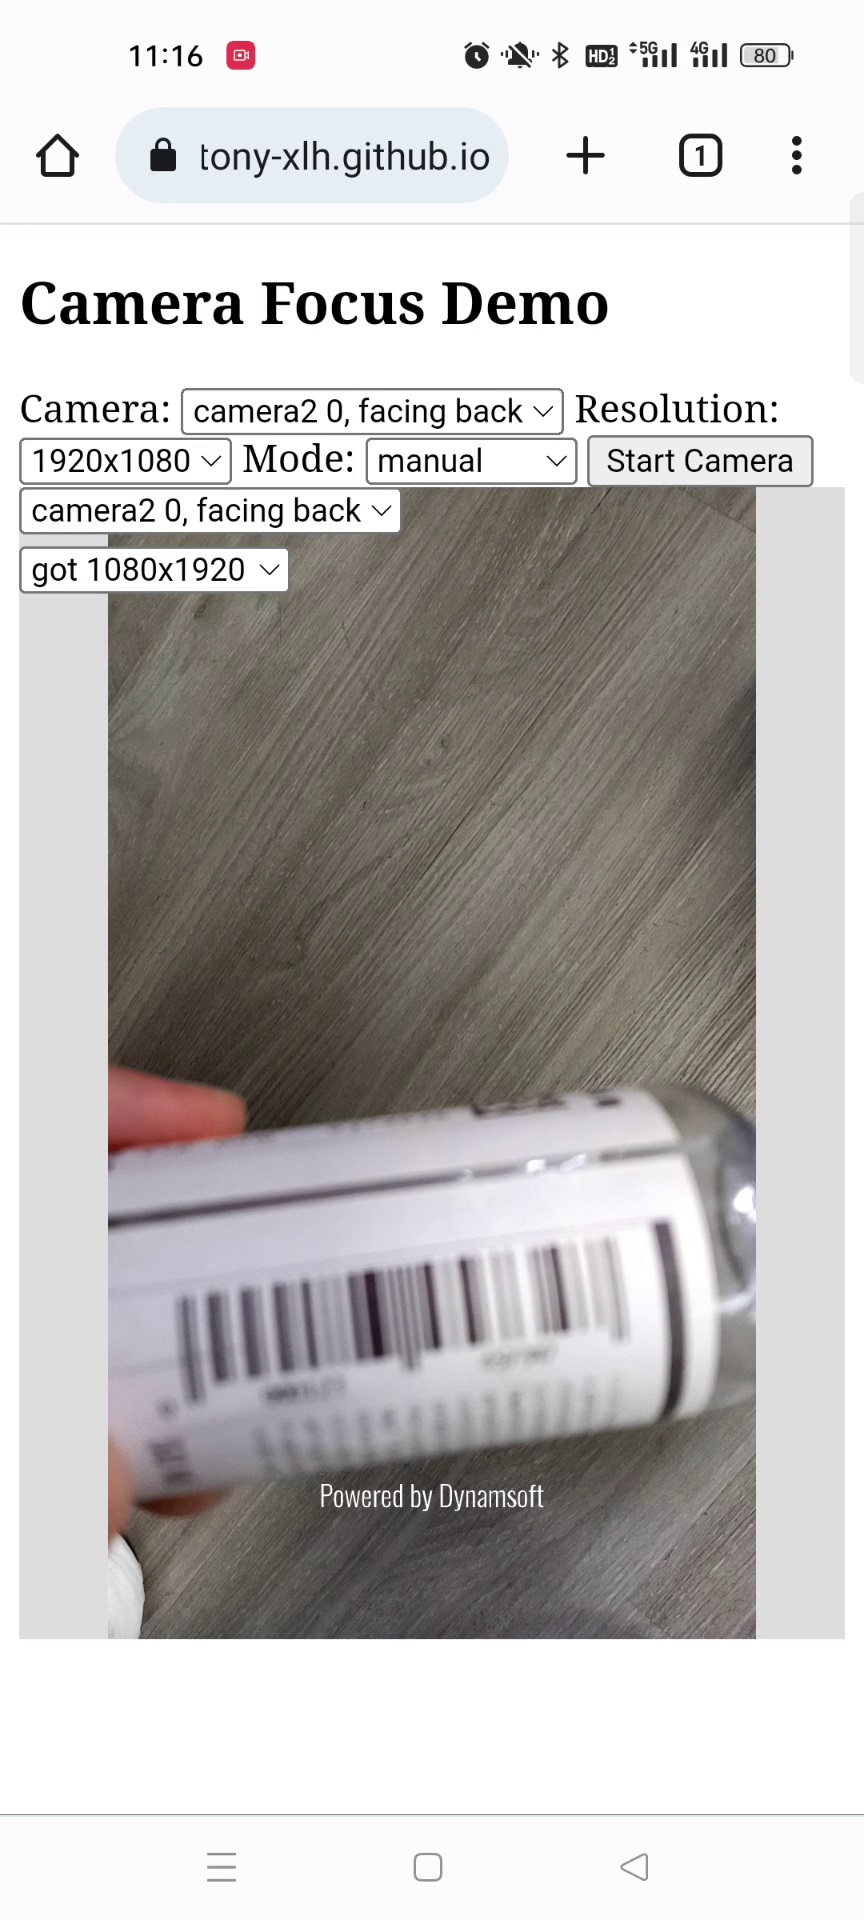
失焦图像:

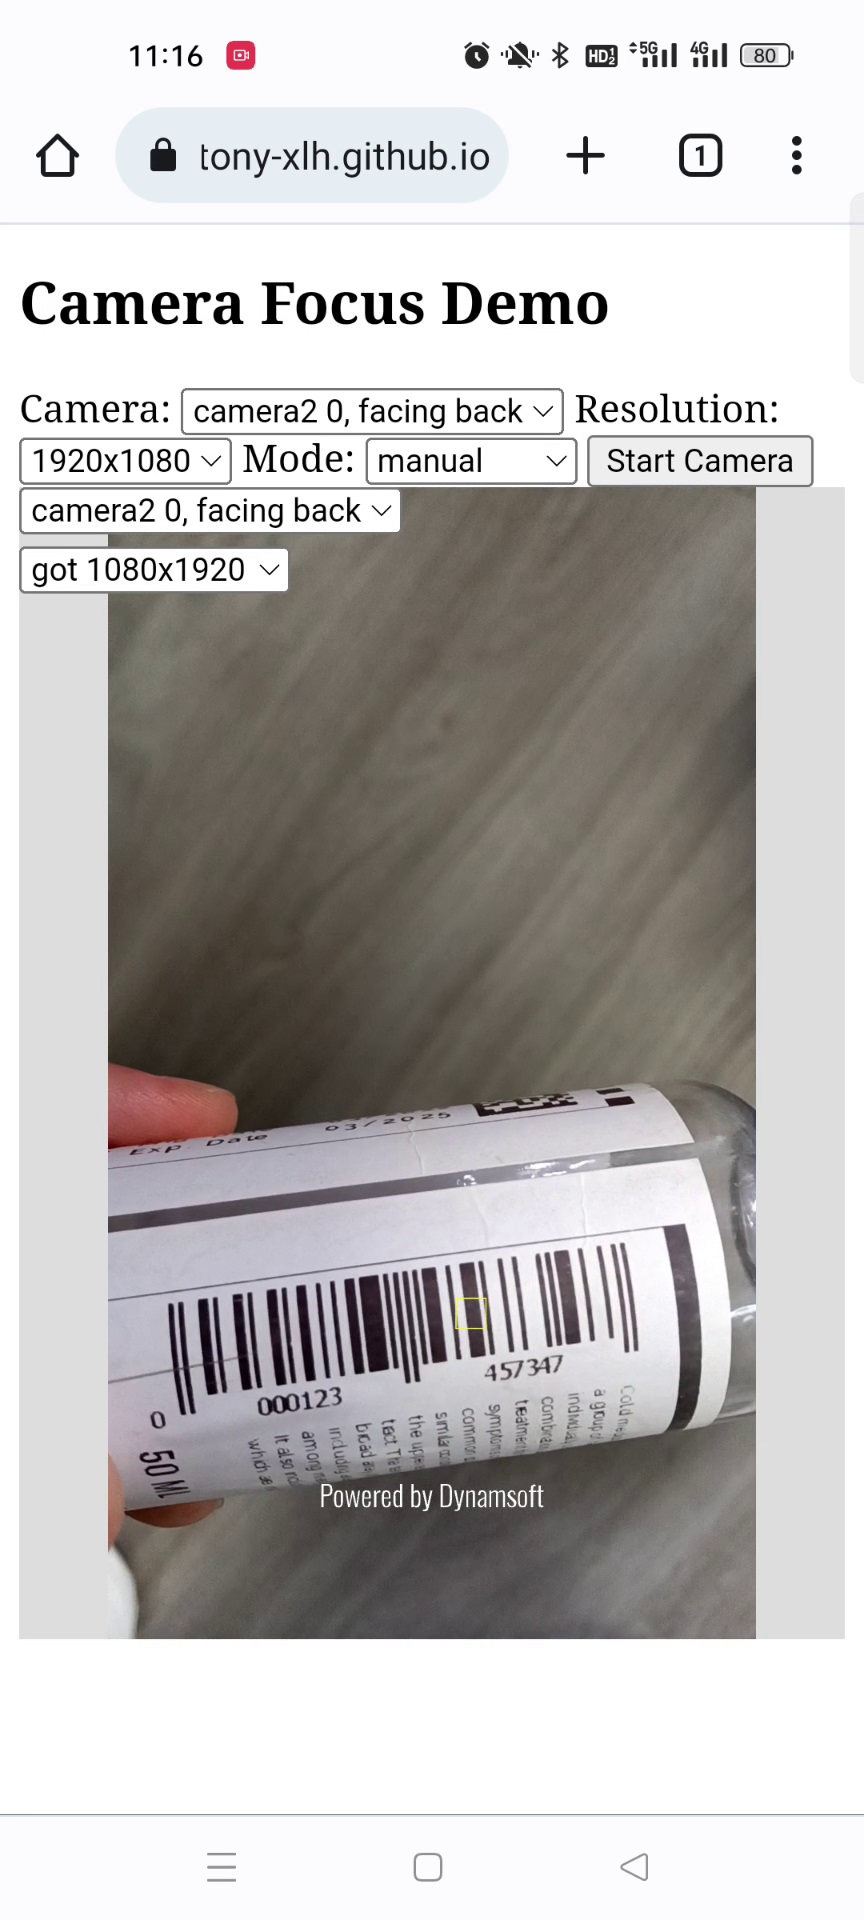
对焦图像:

在Web应用中控制摄像头对焦
下面是分步实现过程。
使用getUserMedia打开摄像头
-
创建一个包含以下模板的新HTML文件。
<!DOCTYPE html> <html> <head> <title>Camera Focus Demo</title> <meta name="viewport" content="width=device-width,initial-scale=1.0,maximum-scale=1.0,user-scalable=0" /> <style> #container { height: 480px; width: 100%; background: lightgray; position: relative; } video { position: absolute; height: 100%; width: 100%; left:0; top:0; object-fit: contain; } button { font-family: monospace; } </style> </head> <body> <h2>Camera Focus Demo</h2> <label> Camera: <select id="select-camera"></select> </label> <label> Resolution: <select id="select-resolution"> <option value="640x480">640x480</option> <option value="1280x720">1280x720</option> <option value="1920x1080" selected>1920x1080</option> <option value="3840x2160">3840x2160</option> </select> </label> <button onclick="startCamera();">Start Camera</button> <br/> <div id="container"> <video id="video" muted autoplay="autoplay" playsinline="playsinline" webkit-playsinline></video> </div> <script type="text/javascript"> </script> </body> </html> -
请求摄像头权限。
async function requestCameraPermission() { try { const constraints = {video: true, audio: false}; const stream = await navigator.mediaDevices.getUserMedia(constraints); closeStream(stream); } catch (error) { console.log(error); throw error; } } function closeStream(stream){ if (stream) { const tracks = stream.getTracks(); for (let i=0;i<tracks.length;i++) { const track = tracks[i]; track.stop(); // stop the opened tracks } } } -
列出摄像头。
let cameras = [] async function listCameras(){ let cameraSelect = document.getElementById("select-camera"); let allDevices = await navigator.mediaDevices.enumerateDevices(); for (let i = 0; i < allDevices.length; i++){ let device = allDevices[i]; if (device.kind == 'videoinput'){ cameras.push(device); cameraSelect.appendChild(new Option(device.label,device.deviceId)); } } } -
以所需的分辨率打开所选摄像头。
async function startCamera(){
  let selectedCamera = cameras[document.getElementById("select-camera").selectedIndex];
  closeStream(document.getElementById("video").srcObject);
  let selectedResolution = document.getElementById("select-resolution").selectedOptions[0].value;
  let width = parseInt(selectedResolution.split("x")[0]);
  let height = parseInt(selectedResolution.split("x")[1]);

  const videoConstraints = {
    video: {width:width, height:height, deviceId: selectedCamera.deviceId},
    audio: false
  };
   const cameraStream = await navigator.mediaDevices.getUserMedia(videoConstraints);
   document.getElementById("video").srcObject = cameraStream;
}
控制摄像头对焦
-
首先,检查浏览器是否支持对焦功能。
function checkBrowserCapabilities(){ if (navigator.mediaDevices.getSupportedConstraints().focusMode) { console.log("Browser supports focus mode"); }else{ alert("The browser does not support focus mode."); } } -
检查所选摄像头是否支持对焦。如果支持,加载对焦距离范围。距离以米为单位。
function checkCameraCapabilities(){ const video = document.querySelector("video"); const videoTracks = video.srcObject.getVideoTracks(); track = videoTracks[0]; let capabilities = track.getCapabilities(); console.log(capabilities); if (!('focusMode' in capabilities)) { alert("This camera does not support focus"); }else{ if (!('focusDistance' in capabilities)) { alert("This camera does not control focus distance"); }else{ loadFocusDistanceRange(capabilities); } } } function loadFocusDistanceRange(cap){ step = cap.focusDistance.step; min = cap.focusDistance.min; max = cap.focusDistance.max; currentDistance = track.getSettings().focusDistance; let range = document.getElementById("distance"); range.value = currentDistance; range.min = min; range.max = max; range.step = step; } -
添加一个
select元素用于设置对焦模式,添加一个input元素用于设置对焦距离。<label> Mode: <select id="select-mode"> <option value="manual" selected>manual</option> <option value="continuous">continuous</option> </select> </label> <br/> <label> Focus distance: <input type="range" id="distance" min="0" max="3" value="0" step="0" onchange="changeDistance()"/> </label> -
如果
input元素的值发生变化,则设置对焦距离。async function changeDistance(){ let mode = document.getElementById("select-mode").selectedOptions[0].value; //https://developer.mozilla.org/en-US/docs/Web/API/MediaTrackConstraints let distance = document.getElementById("distance").value; const constraints = {advanced: [{ focusMode: mode, focusDistance: distance, }]}; await track.applyConstraints(constraints); }
使用Dynamsoft Camera Enhancer
Dynamsoft Camera Enhancer是一个使调用摄像头更方便并加强摄像头功能的库。内部基于getUserMedia API实现。
以下是使用Dynamsoft Camera Enhancer v4的进行摄像头控制的相关函数:
-
列出摄像头。
let cameras = await cameraEnhancer.getAllCameras(); -
以期望的分辨率打开所选摄像头。
let selectedCamera = cameras[document.getElementById("select-camera").selectedIndex];
let selectedResolution = document.getElementById("select-resolution").selectedOptions[0].value;
let width = parseInt(selectedResolution.split("x")[0]);
let height = parseInt(selectedResolution.split("x")[1]);
await cameraEnhancer.selectCamera(selectedCamera);
await cameraEnhancer.setResolution({width:width, height:height});
await cameraEnhancer.open();
HTML:
<div id="enhancerUIContainer"></div> -
获取对焦距离的范围和步长。
cameraEnhancer.getCapabilities().focusDistance //{max: 3, min: 0, step: 0.12} -
设置对焦。
我们可以设置对焦模式和对焦距离:
await cameraEnhancer.setFocus({
    mode: "manual",
    distance: 1
});
我们还可以指定要对焦的区域,这样就可以实现“触摸聚焦”的功能。单位可以是像素或百分比,例如“500px”或“50%”。
cameraEnhancer.setFocus({ mode: mode, area: { centerPoint: { x: (x-25) + "px", y: (y-25) + "px", }, width: "50px", height: "50px" } }); -
绘制被点击的区域。我们可以在点击的点周围画一个矩形,为用户提供一些反馈。
let container = document.getElementById("enhancerUIContainer");
container.addEventListener("click",function(e){
  let {offsetX,offsetY} = calculateOffset();
  let x = (e.offsetX - offsetX)/(container.offsetWidth - offsetX * 2);
  let y = (e.offsetY - offsetY)/(container.offsetHeight - offsetY * 2);
  focus(x,y);
})

function focus(x,y){
  let video = cameraView.getVideoElement();
  x = video.videoWidth * x;
  y = video.videoHeight * y;
  let drawingItems = new Array(
    new Dynamsoft.DCE.RectDrawingItem({
        x: x-25,
        y: y-25,
        width: 50,
        height: 50,
        isMeasuredInPercentage: false
    }));
  drawingLayer.addDrawingItems(drawingItems);
  let mode = document.getElementById("select-mode").selectedOptions[0].value;
  cameraEnhancer.setFocus({
      mode: mode,
      area: {
        centerPoint: {
            x: (x-25) + "px",
            y: (y-25) + "px",
        }
      }
  });
  setTimeout(function(){
    drawingLayer.clearDrawingItems();
  },2000)
}
容器和实际视频内容之间可能存在一些偏移:

我们可以使用以下代码在
object-fit: contain模式中计算偏移值:function calculateOffset(){ let containerWidth = document.getElementById("enhancerUIContainer").offsetWidth; let containerHeight = document.getElementById("enhancerUIContainer").offsetHeight; let video = cameraView.getVideoElement(); let videoWidth = video.videoWidth; let videoHeight = video.videoHeight; let containerRatio = containerWidth/containerHeight; let videoRatio = videoWidth/videoHeight; let offsetX = 0; let offsetY = 0; if (containerRatio > videoRatio) { //has offset in horizontal direction let displayRatio = containerHeight/videoHeight; let displayWidth = displayRatio * videoWidth; offsetX = (containerWidth - displayWidth) /2 }else{ //has offset in vertical direction let displayRatio = containerWidth/videoWidth; let displayHeight = displayRatio * videoHeight; offsetY = (containerHeight - displayHeight) /2 } return {offsetX:offsetX, offsetY:offsetY}; }演示视频:
源代码
欢迎下载源代码并尝试使用:
https://github.com/tony-xlh/getUserMedia-demos/tree/main/focus
