
在上一篇文章中,我们谈到了如何使用固定阈值将图像转换为黑白图像。对于在条码识别等任务中可能出现的光照不均的图像,它的效果并不理想。
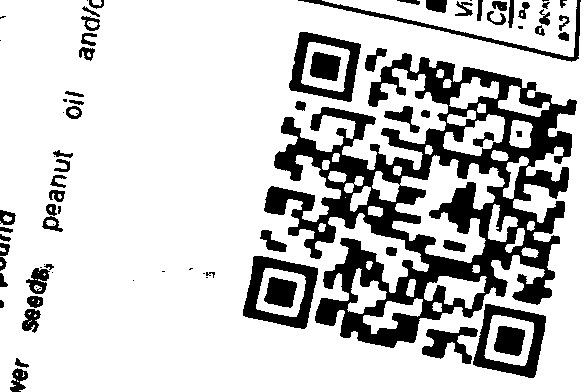
例如,如果我们将以下带阴影的二维码用固定阈值进行二值化,部分二维码内容将丢失,导致无法读取。


对于这种情况,我们可以使用自适应阈值二值化来获得理想的结果。这种方法会根据像素的邻近像素来计算每个像素的阈值。
在本文中,我们将基于HTML5 Canvas使用JavaScript中实现自适应阈值图像二值化。我们还将探讨如何使用Dynamsoft Barcode Reader执行此操作。
新建HTML文件
使用以下内容创建一个新的HTML文件,该文件可以选择本地图像并显示。
<!DOCTYPE html>
<head>
  <meta charset="UTF-8">
  <meta name="viewport" content="width=device-width, initial-scale=1.0">
  <title>Adaptive Thresholding</title>
  <style>
  .imageContainer {
    overflow: auto;
    max-width: 360px;
  }

  .imageContainer img{
    width: 100%;
  }

  #imageHidden {
    display: none;
  }
  </style>
</head>
<html>
<body>
  <div id="app">
    <h2>Adaptive Thresholding</h2>
    <button id="loadFileButton">Load a File</button>
    <input style="display:none;" type="file" id="file" onchange="loadImageFromFile();" accept=".jpg,.jpeg,.png,.bmp" />
    <button id="processButton">Process</button>
    <div id="status"></div>
    <div class="imageContainer">
      <img id="image"/>
      <img id="imageHidden"/>
    </div>
    <pre id="barcodeResult"></pre>
  </div>
  <script>
  document.getElementById("loadFileButton").addEventListener("click",function(){
    document.getElementById("file").click();
  })
  function loadImageFromFile(){
    let fileInput = document.getElementById("file");
    let files = fileInput.files;
    if (files.length == 0) {
      return;
    }
    let file = files[0];
    fileReader = new FileReader();
    fileReader.onload = function(e){
      document.getElementById("image").src = e.target.result;
      document.getElementById("imageHidden").src = e.target.result;
    };
    fileReader.onerror = function () {
      console.warn('oops, something went wrong.');
    };
    fileReader.readAsDataURL(file);
  }
  </script>
</body>
</html>
使用自适应阈值将图像转换为黑白
接下来,用自适应阈值将图像转换为黑白图像。
-
将图像绘制到Canvas上并获取其图像数据。
const cvs = document.createElement("canvas"); const image = document.getElementById("imageHidden"); cvs.width = image.naturalWidth; cvs.height = image.naturalHeight; const ctx = cvs.getContext("2d"); ctx.drawImage(image, 0, 0); const imageData = ctx.getImageData(0,0,cvs.width,cvs.height) -
遍历像素,根据相邻像素计算阈值,并据此修改其像素值。它需要两个额外的参数:块大小和一个常量C。
function adaptiveThreshold(imageData, blockSize, C) { const width = imageData.width; const height = imageData.height; const data = imageData.data; const output = new ImageData(width, height); const outputData = output.data; for (let y = 0; y < height; y++) { for (let x = 0; x < width; x++) { let sum = 0; let count = 0; //local mean for (let dy = -blockSize; dy <= blockSize; dy++) { for (let dx = -blockSize; dx <= blockSize; dx++) { const nx = x + dx; const ny = y + dy; if (nx >= 0 && nx < width && ny >= 0 && ny < height) { const idx = (ny * width + nx) * 4; sum += data[idx]; //use the red channel as the grayscale value count++; } } } const threshold = (sum / count) - C; const idx = (y * width + x) * 4; const pixelValue = data[idx]; // binarize outputData[idx] = outputData[idx + 1] = outputData[idx + 2] = pixelValue > threshold ? 255 : 0; outputData[idx + 3] = 255; // Alpha channel } } return output; } -
将更新后的图像数据放回Canvas中,并显示处理后的图像。
let blockSize = 31;
let C = 10;
let newImageData = adaptiveThreshold(ctx.getImageData(0,0,cvs.width,cvs.height),blockSize,C);
ctx.putImageData(newImageData,0,0);
document.getElementById("image").src = cvs.toDataURL("image/jpeg");
提高运行效率
上述实现的计算复杂度为O(N*k *k)。N代表像素数,k代表块大小。
我们可以使用积分图将复杂度降低到O(N),代码如下:
function adaptiveThresholdWithIntegralImage(imageData, blockSize, C) {
  const width = imageData.width;
  const height = imageData.height;
  const data = imageData.data;
  const output = new ImageData(width, height);
  const outputData = output.data;

  const integral = computeIntegralImage(data, width, height);

  const halfBlock = Math.floor(blockSize / 2);

  for (let y = 0; y < height; y++) {
    for (let x = 0; x < width; x++) {
      const x1 = Math.max(x - halfBlock, 0);
      const y1 = Math.max(y - halfBlock, 0);
      const x2 = Math.min(x + halfBlock, width - 1);
      const y2 = Math.min(y + halfBlock, height - 1);

      const area = (x2 - x1 + 1) * (y2 - y1 + 1);
      const sum = getAreaSum(integral, width, x1, y1, x2, y2);
      const threshold = (sum / area) - C;

      const idx = (y * width + x) * 4;
      const pixelValue = data[idx];
      outputData[idx] = outputData[idx + 1] = outputData[idx + 2] = pixelValue > threshold ? 255 : 0;
      outputData[idx + 3] = 255; // Alpha channel
    }
  }
  return output;
}

function computeIntegralImage(data, width, height) {
  const integral = new Uint32Array(width * height);

  for (let y = 0; y < height; y++) {
    let sum = 0;
    for (let x = 0; x < width; x++) {
      const idx = (y * width + x) * 4;
      sum += data[idx];
      integral[y * width + x] = (y > 0 ? integral[(y - 1) * width + x] : 0) + sum;
    }
  }

  return integral;
}

function getAreaSum(integral, width, x1, y1, x2, y2) {
  const a = x1 > 0 && y1 > 0 ? integral[(y1 - 1) * width + (x1 - 1)] : 0;
  const b = y1 > 0 ? integral[(y1 - 1) * width + x2] : 0;
  const c = x1 > 0 ? integral[y2 * width + (x1 - 1)] : 0;
  const d = integral[y2 * width + x2];
  return d - b - c + a;
}
处理上面的示例图像的时间可以从2000ms缩短到8ms。
Dynamsoft Barcode Reader中的自适应阈值处理
Dynamsoft Barcode Reader会使用自适应阈值法处理图像来读取条码。
以下是通过它的中间结果接收器获取二值化图像的代码。
let router = await Dynamsoft.CVR.CaptureVisionRouter.createInstance();
const intermediateResultReceiver = new Dynamsoft.CVR.IntermediateResultReceiver();
intermediateResultReceiver.onBinaryImageUnitReceived = (result, info) => {
  displayBinarizedImage(result)
};
const intermediateResultManager = router.getIntermediateResultManager();
intermediateResultManager.addResultReceiver(intermediateResultReceiver);
const result = await router.capture(image,"ReadSingleBarcode"); //start image processing
我们可以通过更新它的JSON模板的BinarizationMode部分来修改自适应阈值的参数。
{
"BinarizationMode":
  {
    "BinarizationThreshold": -1,
    "BlockSizeX": 0,
    "BlockSizeY": 0,
    "EnableFillBinaryVacancy": 1,
    "GrayscaleEnhancementModesIndex": -1,
    "Mode": "BM_LOCAL_BLOCK",
    "MorphOperation": "Close",
    "MorphOperationKernelSizeX": -1,
    "MorphOperationKernelSizeY": -1,
    "MorphShape": "Rectangle",
    "ThresholdCompensation": 10
  }
}
源代码
可以在以下仓库中找到所有代码和在线演示:
https://github.com/tony-xlh/adaptive-thresholding-javascript