
Dynamic Web TWAIN是一个给Web应用添加文档扫描功能的SDK。它会在本地运行一个叫Dynamsoft Service的后端服务,通过TWAIN、WIA、eSCL、SANE和ICA等协议与扫描仪进行通信。该服务是跨平台的,可以在Windows、macOS和Linux上运行。
从Dynamic Web TWAIN v18.4开始,可以通过REST API访问Dynamsoft Service,以便我们可以用不同的编程语言创建文档扫描应用程序。
在本文中,我们将用uni-app编写一个小程序来通过这个REST API调用文档扫描仪。
演示视频:
准备工作
- 需要申请一个Dynamic Web TWAIN的许可证来使用它。可以在这里申请。
- 需要在电脑上安装Dynamsoft Service。可以在下表中找到下载链接:
REST API概览
端点:http://127.0.0.1:18622。可以访问配置页面http://127.0.0.1:18625/对IP等内容进行配置。如果设置了局域网IP,那局域网内其它设备也可以通过安装了Dynamsoft Service的这台设备来扫描文档。不设的话则默认只开放给本机。
API接口:
-
列出扫描仪。
HTTP方法和URL:
GET /DWTAPI/Scanners响应示例:
[
  {
    "name":"scanner name",
    "device":"detailed info of the scanner",
    "type": 16
  }
]
以下是扫描仪类型及其相应值的列表。
16: TWAIN 32: WIA 64: TWAINX64 128: ICA 256: SANE 512: eSCL 1024: WIFIDIRECT 2048: WIATWAIN -
创建文档扫描作业。
HTTP方法和URL:
POST /DWTAPI/ScanJobs请求示例:
{
  "license":"license of Dynamic Web TWAIN",
  "device":"detailed info of the scanner", #optional. Use the latest device by default
  "config":{ # Device configuration https://www.dynamsoft.com/web-twain/docs/info/api/Interfaces.html#DeviceConfiguration (optional)
    "IfShowUI":true, # show the UI of the scanner
    "Resolution":200,
    "IfFeederEnabled":false, # enable auto document feeder
    "IfDuplexEnabled":false # enable duplex document scanning
  },
  "caps":{ # Capabilities https://www.dynamsoft.com/web-twain/docs/info/api/Interfaces.html#capabilities (optional)
    "exception":"ignore",
    "capabilities":[
      {
        "capability":"", #pixel type
        "curValue":0 #0: black&white, 1: gray, 2: color
      }
    ]
  }
}
响应:
状态码201,返回作业ID
-
获取扫描的文档图像。
HTTP方法和URL:
GET /DWTAPI/ScanJobs/:jobid/NextDocument响应:
状态码200,返回图像的字节
-
获取扫描作业的信息。
HTTP方法和URL:
GET /DWTAPI/ScanJobs/:jobid/DocumentInfo -
删除扫描作业。
HTTP方法和URL:
DELETE /DWTAPI/ScanJobs/:jobid
小程序是否支持访问局域网IP
查看文档,我们可以知道,小程序可以直接访问局域网IP,并且不强制要求https。
wx.request({
  url: 'http://10.9.176.40:828'
})
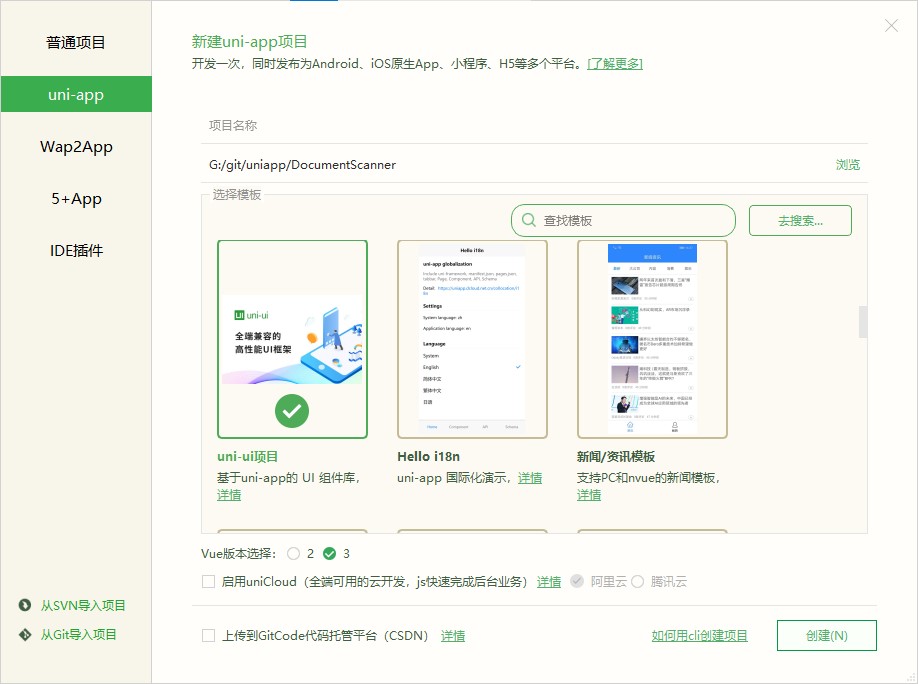
新建uni-app项目
使用HBuilerX创建新的使用uni-ui组件的uni-app项目。
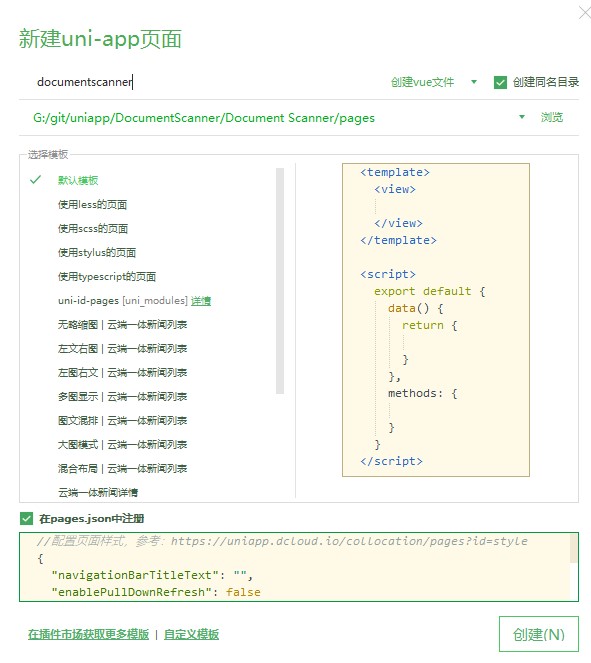
新建文档扫描页面
新建一个叫documentscanner的文档扫描页面。
在首页中,添加一个button,调转到该页面。
<template>
  <view class="container">
    <view class="intro">
      <button type="default" @click="goto('/pages/documentscanner/documentscanner')">前往文档扫描页面</button>
    </view>
  </view>
</template>

<script setup lang="ts">
  const goto = (url:string) => {
    uni.navigateTo({
      url:url
    })
  }
</script>

<style>
.container {
  padding: 20px;
  font-size: 14px;
  line-height: 24px;
}
</style>
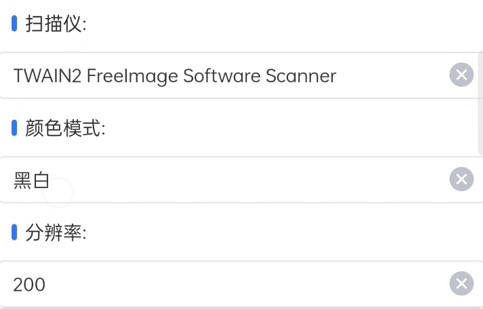
添加配置扫描的控件
在扫描页面,添加选择扫描仪、颜色模式、分辨率的相关控件。在页面挂载时,通过REST API列出连接的扫描仪。
<template>
  <view>
    <view class="scanner">
      <uni-section title="扫描仪:" type="line">
        <uni-data-select
          v-model="selectedScanner"
          :localdata="scanners"
        ></uni-data-select>
      </uni-section>
      <uni-section title="颜色模式:" type="line">
        <uni-data-select
          v-model="selectedColorMode"
          :localdata="colorModes"
        ></uni-data-select>
      </uni-section>
      <uni-section title="分辨率:" type="line">
        <uni-data-select
          v-model="selectedResolution"
          :localdata="resolutions"
        ></uni-data-select>
      </uni-section>
    </view>
    <view v-if="status" class="mask">
      <text class="status"></text>
    </view>
  </view>
</template>

<script setup lang="ts">
import { onMounted, ref } from 'vue';
  const host = "http://192.168.8.65:18622/"
  const license = "";
  onMounted(() => {
    getScanners();
  })
  const status = ref("");
  let selectedScanner = -1;
  const scanners = ref([]);
  let selectedColorMode = 0;
  const colorModes = [
    {
      value:0,text:"黑白"
    },{
      value:1,text:"灰度"
    },{
      value:2,text:"彩色"
    }
  ];
  let selectedResolution = 200;
  const resolutions = [
    {
      value:300,text:"300"
    },{
      value:200,text:"200"
    },{
      value:100,text:"100"
    }
  ];
  const getScanners = () => {
    status.value = "读取扫描仪中列表……";
    uni.request({
        url: host+'DWTAPI/Scanners',
        data: {},
        header: {},
        success: (res) => {
          status.value = "";
          console.log(res.data);
          let devices:any[] = res.data as any[];
          let connectedScanners = [];
          for (var i = 0; i < devices.length; i++) {
            let device = devices[i];
            let connectedScanner = {
              value:device.device,
              text:device.name
            }
            connectedScanners.push(connectedScanner);
          }
          scanners.value = connectedScanners;
        },
        fail: (res) => {
          status.value = "done";
          console.log(res);
        }
    });
  }
</script>
<style scoped>
.scanner {
  position: fixed;
  left: 0;
  top: 0;
  width: 100%;
  height: 100vh;
  display: flex;
  flex-direction: column;
}

.mask {
  display: flex;
  flex-direction: row;
  align-items: center;
  justify-content: center;
  position: fixed;
  left: 0;
  top: 0;
  width: 100%;
  height: 100%;
  background-color: black;
  opacity: 70%;
}

.status {
  color: white;
}
</style>
扫描文档
添加一个扫描文档的按钮和用于显示扫描文档的视图。
<button style="width:100%" type="default" @click="scan()">扫描</button>
<view class="image-list">
  <view v-for="(scanned, index) in scans" class="scanned" >
    <image v-on:click="showAction(index);" mode="aspectFit" style="width: 100%; height: 200px;"  :src="scanned" alt=""/>
  </view>
</view>
CSS:
.image-list {
  flex: 1;
  overflow: auto;
}

.scanned {
  margin-top: 10px;
}
按钮被点击时,创建一个扫描任务,然后获取文档图像。
const scans = ref([]);
const createScanJob = () => {
  status.value = "扫描中……";
  uni.request({
      url: host+'DWTAPI/ScanJobs',
      data: {
        "license":license,
        "device":selectedScanner,
        "config":{ //Device configuration https://www.dynamsoft.com/web-twain/docs/info/api/Interfaces.html#DeviceConfiguration (optional)
           "IfShowUI":false, //show the UI of the scanner
           "Resolution": selectedResolution,
           "IfFeederEnabled": false, //enable auto document feeder
           "IfDuplexEnabled": false //enable duplex document scanning
         },
         "caps":{ // Capabilities https://www.dynamsoft.com/web-twain/docs/info/api/Interfaces.html#capabilities (optional)
           "exception":"ignore",
           "capabilities":[
             {
               "capability":257, //pixel type
               "curValue":selectedColorMode //0: black&white, 1: gray, 2: color
             }
           ]
         }
      },
      method:"POST",
      header: {},
      success: (res) => {
        getDocumentImage(res.data as string)
      },
      fail: (res) => {
        console.log(res);
        status.value = "";
      }
  });
}

const getDocumentImage = (jobID:string) => {
  status.value = "获取图片中……";
  uni.request({
      url: host+"DWTAPI/ScanJobs/"+jobID+"/NextDocument",
      data: {},
      responseType: 'arrayBuffer',
      method:"GET",
      header: {},
      success: (res) => {
        const arrayBuffer = new Uint8Array(res.data as ArrayBuffer)
        const dataURL = "data:image/png;base64," + uni.arrayBufferToBase64(arrayBuffer)
        const scanned = dataURL || ''
        scans.value.push(scanned);
        status.value = "";
      },
      fail: (res) => {
        console.log(res);
        status.value = "";
      }
  });
}
const scan = () => {
  createScanJob();
}
保存扫描的文档图像
点击图片时,通过uni-popup弹出一个对话框,确认要不要保存文档图像到本地。
HTML:
<view>
  <uni-popup ref="popup" type="dialog">
    <uni-popup-dialog class="popup-content" type="info" mode="base" content="保存该图?" :duration="0" :before-close="true" @close="closeDialog" @confirm="confirmDialog"></uni-popup-dialog>
  </uni-popup>
</view>
<view>
  <uni-popup ref="message" type="message">
    <uni-popup-message type="success" message="保存成功" :duration="2000"></uni-popup-message>
  </uni-popup>
</view>
CSS:
.popup-content {
  display: flex;
  flex-direction: row;
  align-items: center;
  justify-content: center;
  padding: 15px;
  background-color: #fff;
}
JavaScript:
let selectedScanIndex = -1;
const showAction = (index:number) => {
  console.log("clicked");
  selectedScanIndex = index;
  popup.value.open('top');
}

const closeDialog = () => {
  popup.value.close()
}

const confirmDialog = () => {
  const dataURL = scans.value[selectedScanIndex];
  const path = `${wx.env.USER_DATA_PATH}/${selectedScanIndex}.png`;
  const fsm = wx.getFileSystemManager();
  fsm.writeFile({
    filePath: path,
    data: dataURL.replace(/^data:image\/\w+;base64,/, ''),
    encoding: 'base64',
    success: () => {
      uni.saveImageToPhotosAlbum({
        filePath: path,
        success: () => {
          message.value.open();
        }
      });
    }
  })
  popup.value.close()
}
源代码
欢迎下载源代码并尝试使用: